Jula 422-075 Pole lamp User Manual

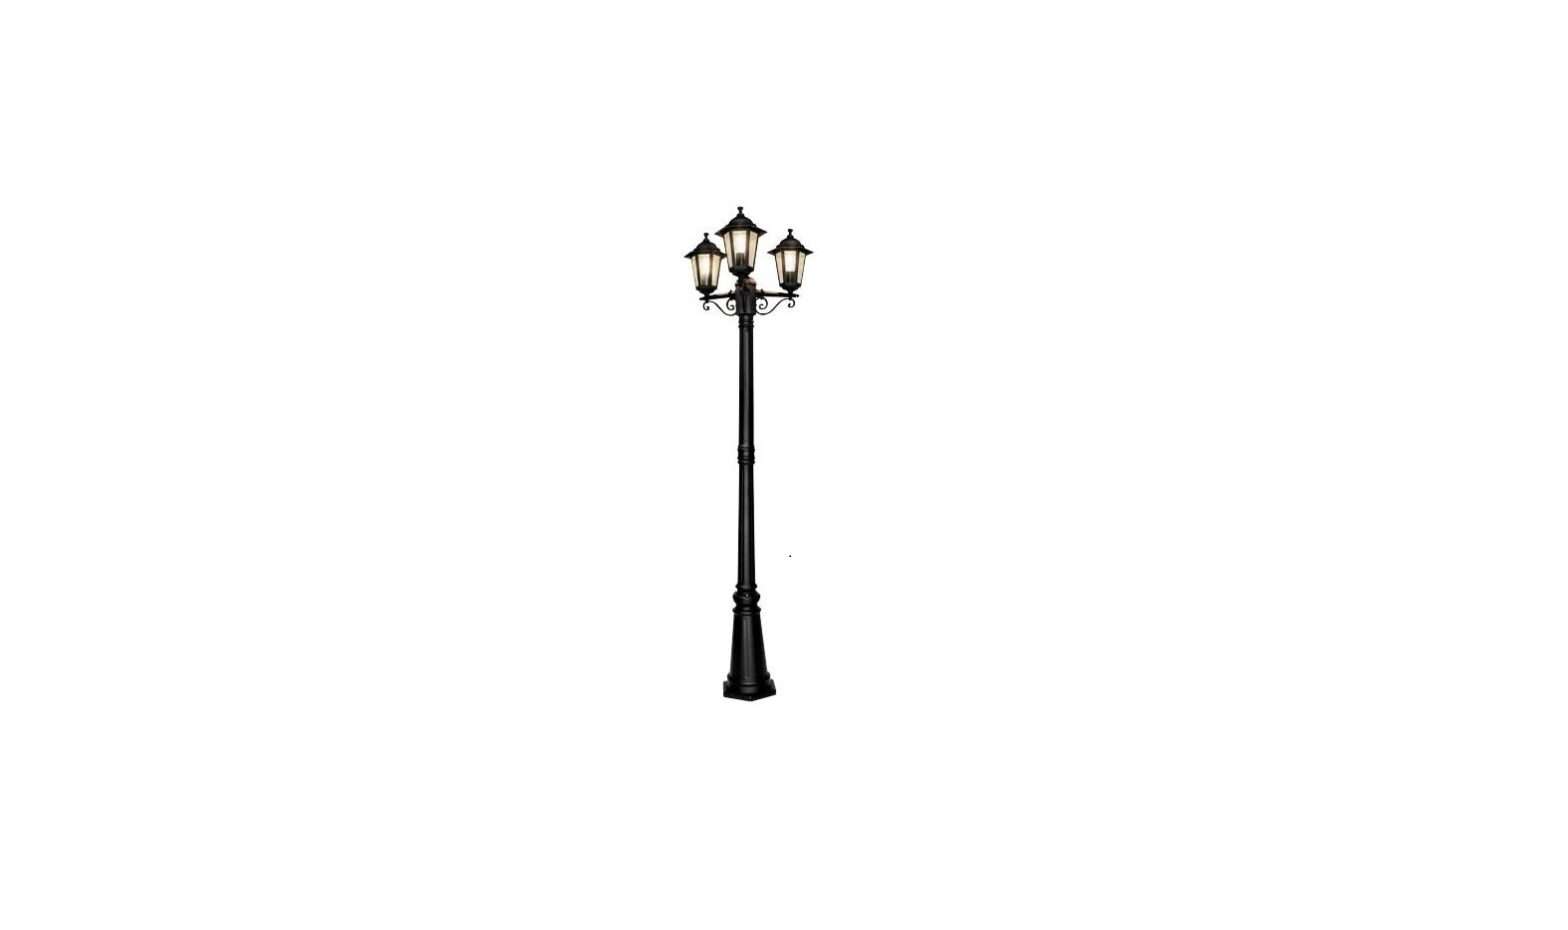
POST LANTERN
OPERATING INSTRUCTIONS
Important! Read the user instructions carefully before use. Save them for future reference. (Translation of the original instructions).
Care for the environment!
Recycle discarded product in accordance with local regulations.
Jula reserves the right to make changes. For latest version of operating instructions, see www.jula.com
![]()
JULA AB, BOX 363, SE-532 24 SK.ARA
2021-12-07
© Jula AB

SAFETY INSTRUCTIONS
ELECTRICAL SAFETY
- New installations and extensions to existing systems must always be performed by a qualified electrician.
- If you have the necessary experience and knowledge, you may replace switches and wall sockets, fit plugs, extension cords and lamp holders. If not, you should contact an electrician. Improper installation may result in electric shock or fire.
- Check that the power supply is disconnected before installation and servicing.
- When the lamp is switched on, the temperature in the bulb gradually increases. Do not touch the bulb when it is on or has been switched off but not cooled sufficiently.
- Switch off the lamp and wait until it has cooled before you replace it.
- The bulb output must never exceed the stated output.
- If the glass in the lamp shade is damaged, it must be replaced as soon as possible. Do not use the lamp if the lamp shade is broken.
- Do not look directly at a bulb that is switched on.
- Make sure the lamp is properly earthed.
- Use power supply cables that are at least 1 mm2, type HOSRN-F.
- Connect the cables to the double pole switch.
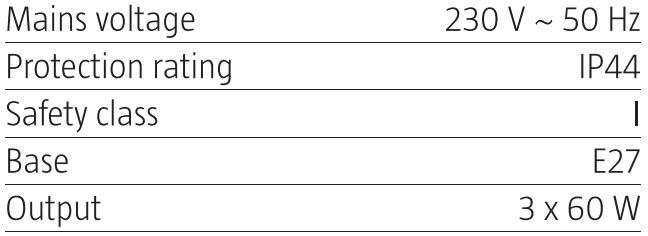
TECHNICAL DATA

DESCRIPTION
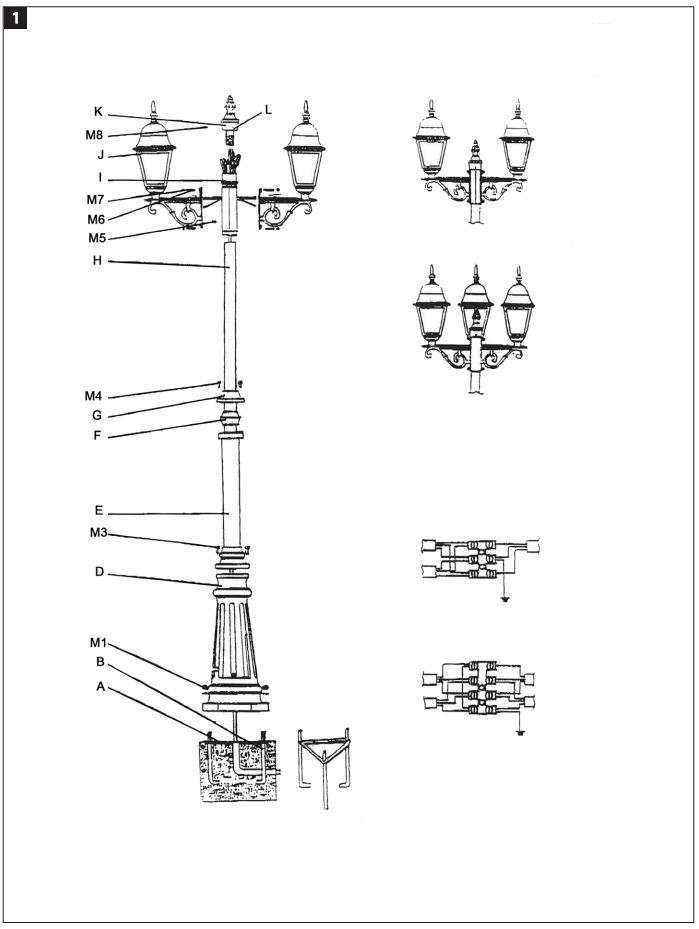
- A. Triangular support
- B. Anchor rod
- D. Base
- E. Lower lamp post
- F. Plastic expander
- G. Sleeve
- H. Upper lamp post
- I. Adapter
- J. Lamp
- K. Post head
- L1 Terminal block
- L2. Terminal block IP44
- M1 M10 nut and washer
- M3. Screw M6 x 16
- M4. Screw MS x 10
- M5. Screw MS x 5
- M7. Nut
- M8. Screw
FIG. 1
ASSEMBLY
BASE
- Dig a hole with an even bottom, size 25 x 25 x 14 cm (I x w x h).
- Pull the power cords through the bottom of the hole and 25 cm above ground level.
- Fit the three anchor rods (B) on the triangular support (A).
- Pour ready-mixed cement into the hole. Place the anchor rods and support vertically in the cement. Fill with cement to ground level.
- Make sure the anchor rods fit the lamp post base (D). If not, rotate the rods to the correct position.
- Install the lamp post when the cement has set.
INSTALLATION
- Fit the adapter (I) to the upper lamp post (H) using the screws (MS).
- Insert the wires for the lamp housing (J) in the adapter (I) and fit the lamp on the adapter using the nut (M7) and threaded pin (M6).
- Undo the post head (K) and connect the lamp housing wires and the prepared wire (not supplied). Connect a brown wire to brown, yellow/green to yellow/ green, and a blue wire (neutral) to blue. Pass the wires through the upper and lower lamp post respectively (G) and (D). Fit the post head (K) on the post using the screws (M8).
- Fit the lower part (E) of the lamp post on the base (D) using the screws (M3).
- Fit the base (D) on the anchor rods (B) using a nut and washer (M1).
- Adjust the lamp post to the height required and secure the upper part of the lamp post using the screw (M3).
Download PDF
Jula 422-075 Pole lamp User Manual PDF Download


