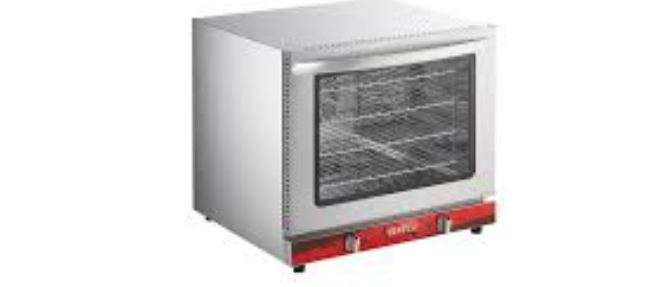
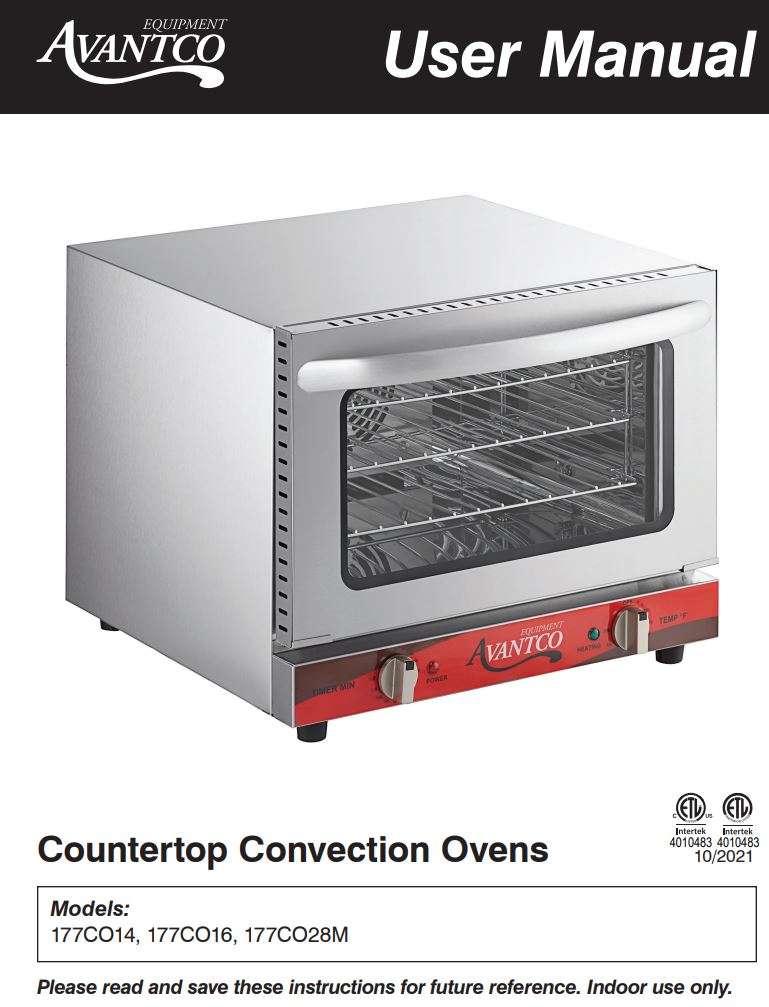
AVANTCO 177CO14,177CO16, 177CO28M Series Countertop Convection
Ovens User Manual
Important Safeguards
When using electrical appliances, basic safety precautions should always be followed, including the following:
- Read all instructions carefully and completely.
- For commercial use only.
- Do not touch hot surfaces.
- Protect against electrical shock by keeping all cords, plugs, and other electrical components away from water or other liquids.
- Unplug this unit when not in use and before cleaning.
- Allow the unit to cool before putting on or taking off parts.
- Do not operate this or any appliance with a damaged electrical cord or plug.
- Do not operate this or any appliance after it has malfunctioned or been damaged in any way.
- Do not use outdoors.
- Do not place on or near a hot gas or electric burner.
- Attach plug to appliance first, then plug electrical cord into the wall outlet.
- Disconnect the unit by turning the temperature and timer control to “OFF”, then removing the electrical plug from the wall outlet.
- Do not use appliance for any application other than intended use.
- Do not insert metal utensils or oversized foods into this unit as they may cause a fire and heighten the risk of electrical shock.
- Do not store any item on top of this unit when in operation.
- Do not allow this oven to touch or be covered by flammable material, such as curtains, draperies, walls, etc., when in operation.
- Do not clean with metal scouring pads as pieces can break off and touch electrical components, heightening the risk of electrical shock
- Never place materials such as paper, cardboard, plastic, etc. in this oven.
- Do not cover interior of this unit with metal foil as it may cause the oven to overheat.
- Avoid scratching the surface or nicking the edges of this unit’s tempered, safety glass door. If the oven door has a scratch or nick, contact customer service before use.
- Turn the appliance off by turning the temperature and timer control to the “OFF” position.
- Note that the use of accessories not recommended by the manufacturer may result in injury.
- Children should be supervised to ensure that they do not play with the oven.
- This appliance is not intended for use by persons (including children) with reduced physical sensory or mental capabilities, or lack of experience and knowledge, unless they have been given supervision or instruction concerning use of the appliance by a person responsible for their safety.
- When using the appliance in shops, snack bars, hotels etc., check the voltage and outlet to make sure the appliance is correctly connected with power.
- Place unit on a flat surface that is well ventilated. The appliances must be supervised during operation, DO NOT leave appliance without powering off.
NOTE: Save these instructions for future reference.
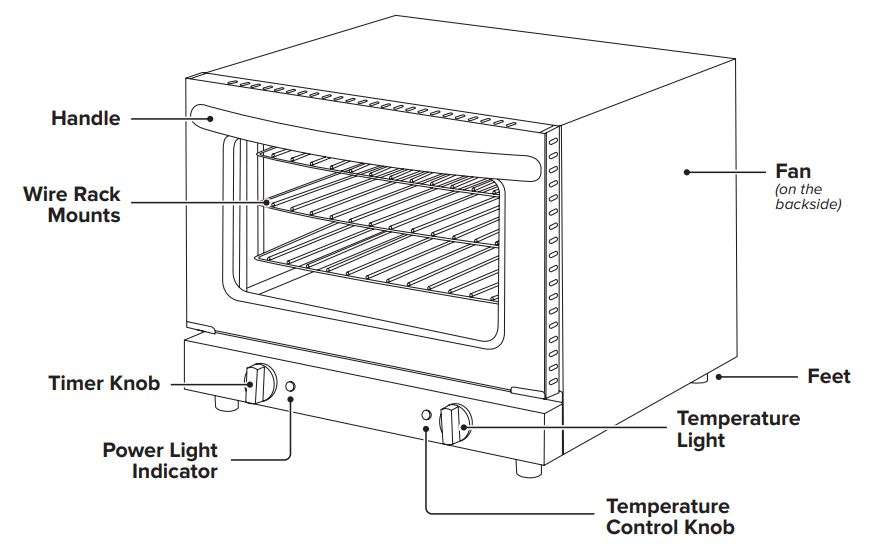
Identification of Key Parts
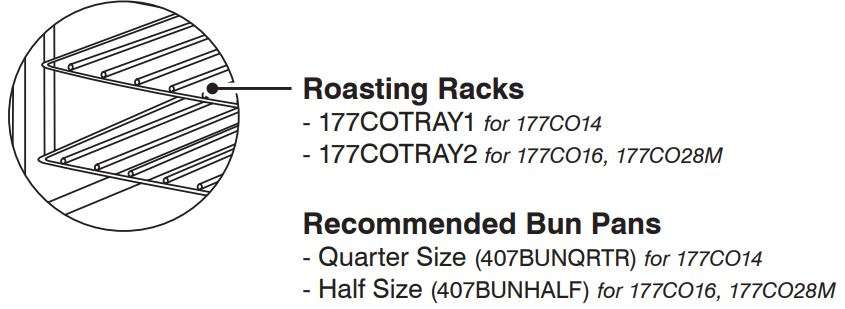
Identification of Accessories
Usage Guidelines
120V Units
| Food Items | Temperature (°F) | Time (Minutes) | Quantity/HR |
| Cookies | 350 | 15 | 60 |
| Brownies | 325 | 25 | 2 Trays |
| Biscuits | 350 | 30 | 20 |
| Dinner Rolls | 350 | 18 | 65 |
| Bacon (sliced) | 350 | 15 | 3 Trays |
| Cheese Medium Pizza (frozen) | 400 | 22 | 2 |
| Baked Chicken Breast 8oz* | N/A | N/A | N/A |
*Times and temperatures are used as a guide only.
- Good for limited electrical options and/or outlets
- Great for supplemental baking, low volume small batches of baked goods, and sandwich warming at coffee chops, kiosks, churches, schools, and more
- Compact design great for small footprint and countertop needs
Not intended for high volume, high temperature requirements. Intended for supplemental baking. Allow proper time for recovery in order to ensure maximum performance.
*Units not intended for daily roasting or baking protein.
*Units not intended to replace heavy duty floor model convection ovens.
*Usage: approximately 4 hours per day, 5 days a week.
208/240V Units
| Food Items | Temperature (°F) | Time (Minutes) | Quantity/HR |
| Cookies | 350 | 15 | 70 |
| Brownies | 325 | 25 | 3 Trays |
| Biscuits | 350 | 30 | 24 |
| Dinner Rolls | 350 | 18 | 75 |
| Bacon (sliced) | 350 | 15 | 4 Trays |
| Cheese Medium Pizza (frozen) | 400 | 22 | 4 |
| Baked Chicken Breast 8oz | 375 | 20 | 60 |
| Protein (roast) 10lbs* | 350 | 60 | 10lbs |
*Times and temperatures are used as a guide only.
- Great for supplemental baking, low volume baking, and medium volume sandwich warming at coffee shops, kiosks, churches, schools, and more
- Compact design great for small footprint and countertop needs
- Not good for high volume applications, frozen items, sheet cakes, delicate baking, or roasting
Not intended for high volume, high temperature requirements. Intended for supplemental or low volume baking. Allow proper time for recovery in order to ensure maximum performance.
*Units not intended for daily roasting or baking protein.
*Units not intended to replace heavy duty floor model convection ovens.
*Usage: approximately 4 hours per day, 5 days a week.
Before Using Your Oven
Before cooking anything in your oven for the first time, please follow these simple instructions: Using a small amount of detergent, wash the handle and roasting racks with soapy water. (NOTE: Do not use a spray or abrasive polishing agent.) Gently wipe down interior walls with a damp cloth. While washing this unit, do not to touch the electric heating element. Do not soak the inside of the oven with water. After washing and thoroughly drying the surfaces noted above, place the roasting racks back inside the oven. For first-time use of the oven, close the door and turn the bake control to max temperature. Set the timer for 30 minutes. During this burn-in you may notice a slight odor, this is normal. This process helps remove any fumes or odors which may be present.
Using Your Oven
To start your oven, you need to turn on the temperature dial to set your desired cooking temperature, and turn on the timer dial to set the cooking time.
NOTICE: Rubber feet or legs must be installed to comply with sanitation and airflow clearance requirements. If the legs are not installed properly, the warranty will be voided.
CAUTION: During the baking process, make sure that no metal accessory comes in contact with the electric heating elements.
CAUTION: Foods baked in this oven will be hot. Wear oven mitts when reaching into oven to retrieve food.
Typical Operation Sequence
| Action | Result |
| Plug in your oven | Power is connected but power light will go on after turning the temperature dial |
| Adjust temperature control knob | Heating indicator light comes on; heating elements begin to heat up |
| Temperature light shuts of | Oven has reached desired temperature |
| Load product into oven | Product will begin to cook |
| Set timer to desired cook time between 0-120 min | Timer starts timing down |
| Timer reaches zero | Timer chimes |
| Unload oven | Product will be cooked/hot; use caution removing it from the oven |
Temperature Control Knob
The temperature range of this unit is 0-500°F on 120V models and 0-550°F on 208/240V models. This thermostatic switch controls the temperature inside the oven and helps to maintain the proper temperature during various heating, roasting, and baking applications.
Power & Heating Indicator Light
Anytime this appliance is connected to the power supply with the temperature knob turned on, the power and heating indicator light will be on and the fan motor will begin to operate.
Protection Component
If the temperature of this oven reaches an unsafe limit, the electrical components will shut off and it will stop operating in order to prevent overheating.
Cleaning & Maintaining Your Oven
To clean, first remove the power cord’s plug from the wall outlet. Wait for the oven to cool. Use a damp cloth or sponge to gently wipe down the inside of the oven. Avoid soaking the inside of the oven or washing it in running water as this will cause serious damage to the unit.
Space Clearance
There must be a minimum of 12″ (30.4 cm) between the equipment and any surrounding walls. The surrounding walls must be made of non-combustible materials. The vent located at the rear of the oven must NOT be obstructed. The equipment must be installed in accordance with local fire and building regulations.
Specifications
| Model # | Power Supply | Dimensions | Unit Weight | Size | Capacity | Rack # | Plug |
| 177CO14 | 120V, 60Hz, 1440W | 18¾”W x 18″D x 15″H | 30 lbs. (35 lbs. shipping) | Quarter | 0.8 cu. ft | 3 Racks | NEMA 5-15 |
| 177CO16 | 120V, 60Hz, 1600W | 23″W x 22½”D x 16½”H | 43 lbs. (50 lbs. shipping) | Half | 1.5 cu. ft | 4 Racks | NEMA 5-15 |
| 177CO28M | 208/240V, 60Hz, 2100/2800W | 23″W x 22½”D x 20″H | 50 lbs. (59 lbs. shipping) | Half | 2.3 cu. ft | 4 Racks | NEMA 6-20P |
Troubleshooting
Problem: The oven does not become hot after being switched on.
- Make sure oven is plugged in.
- Be sure that the temperature control knob is set.
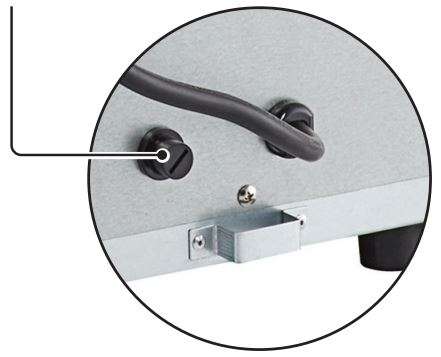
- Reset switch has tripped. Check reset switch on the back of the unit.
Problem: There is a metallic sound when the oven is in use.
- Do not attempt to dismantle the oven.
- Contact your service agent right away to examine the fan.
Problem: Food is often overcooked or burned, even when cooked according to the recipe.
- Check that the fan motor is operating normally.
- Contact your service agent to examine the temperature control knob.
- Oven or racks not level. Check oven racks and level.
- Insufficient airspace around trays or baking tins. Ensure oven racks are spaced to allow airflow around baking on all shelves.
- Oven overloaded with too much product. Reload oven with less product.
- Opening oven door unnecessarily. Ensure oven door remains closed during the baking process.
- Oven vent restricted. Ensure oven vent is not blocked or shrouded.
Problem: There is a loud pop sound or the unit stops working.
Possible Cause: Reset switch tripped. This switch is a safety switch designed to prevent the oven from overheating. If it was triggered the unit was run at too high of a temperature for too long.
Solution: The reset switch is located on the back of the oven, covered by a black plastic screw cap.
Remove the cap, press the switch.
Download Manual PDF
AVANTCO 177CO14,177CO16, 177CO28M Series Countertop Convection
Ovens User Manual PDF Download
