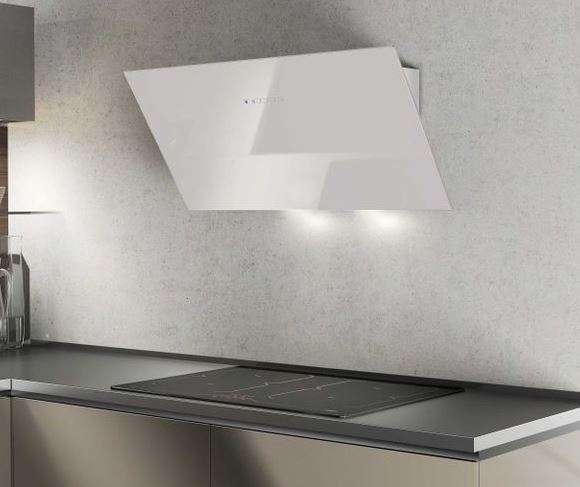
BOSCH Worktop Solutions Longlife Recirculation
Set User Manual

⚠ General information
- Read this instruction manual carefully.
- Keep the instruction manual and the product information safe for future reference or for the next owner.
- The appliance can only be used safely if it is correctly installed according to the safety instructions. The installer is responsible for ensuring that the appliance works perfectly at its installation location.
- This instruction manual is intended for the installer of the optional accessory.
- Only a licensed expert may connect the appliance.
- Switch off the power supply before carrying out any work.
Safe installation
Observe the safety instructions when installing the optional accessory.
⚠ WARNING Risk of suffocation! Children may put packaging material over their heads or wrap themselves up in it and suffocate. Keep packaging material away from children. Do not let children play with packaging material.
⚠ WARNING Risk of injury! Components inside the appliance may have sharp edges. Wear protective gloves. The odour filter remains hot for quite some time after it has been regenerated. Do not touch the odour filter straight after it has been regenerated allow it to cool down.
Included with the appliance
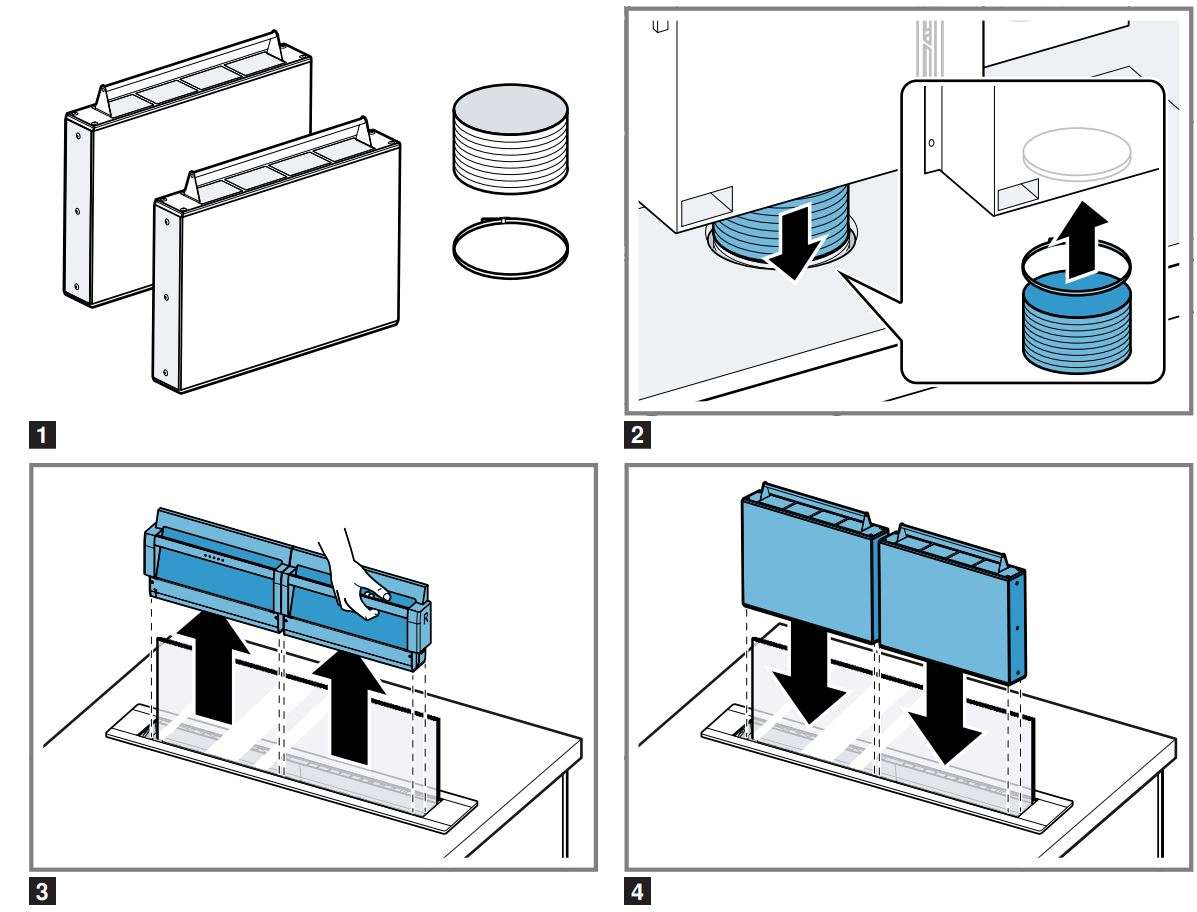
After unpacking all parts, check for any damage in transit and completeness of the delivery. Fig. 1
Establishing the pipework
- Establish the pipework in such a way that the flexible hose is flush with the cabinet base. Fig. 2
- For circulating-air mode, establish an air outlet in the unit’s front toe kick. The air outlet must have a minimum cross section of approximately 400 cm². Make the outlet opening in the base panel as large as possible in order to keep draughts and noise to a minimum.
Fitting odour filters
- Press . a The glass panel moves up to halfway upwards and grease filter cassettes are transported upwards.
- Remove the grease filter cassettes. Fig. 3
- Insert the odour filter cartridges. Fig. 4
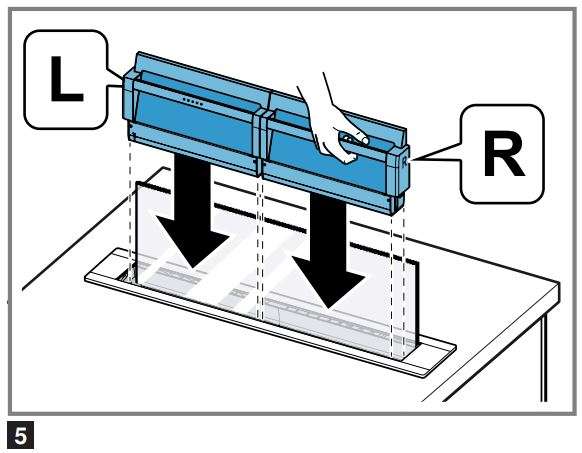
- Insert the grease filter cartridges. Fig. 5
- Press . a The glass panel and the filter cartridges move downwards. a The appliance flap closes and the appliance switches off.
Cleaning the odour filter
ATTENTION! Incorrect cleaning damages the regenerative odour filter. Observe the regeneration instructions. Never clean a regenerative odour filter with clean-
ing products, water, in the dishwasher or with a wet cloth. If the regenerative odour filters are visibly soiled, remove the dirt with a damp cloth before starting the regeneration process. Ensure that the odour filter does not get wet.
Regenerating the odour filter
⚠ WARNING Risk of fire! The oven cleaning function (pyrolytic self-clean) may cause a regenerable odour filter to catch fire. Never regenerate a regenerable odour filter with the oven cleaning function (pyrolytic self-clean).
⚠ WARNING Risk of injury!
The odour filter remains hot for quite some time after it has been regenerated. Do not touch the odour filter straight after it has been regenerated allow it to cool down. Note: During the regeneration process, parts of the odour filter may become discoloured. This discolouration has no effect on the performance of the odour filter.
Requirement: The odour filter is removed.
- Preheat the oven to a maximum of 200 °C (air re- circulation ).
- To ensure that you do not scratch the baking tray, place the odour filter on a wire rack.
- During regeneration, an odour may develop. Open a window to ensure that the room is well ventilated.
- Regenerate the regenerative odour filter with the following settings.

- Leave the hot odour filter to cool down on a heat resistant surface.
Download Manual PDF
BOSCH Worktop Solutions Longlife Recirculation
Set User Manual PDF Download
