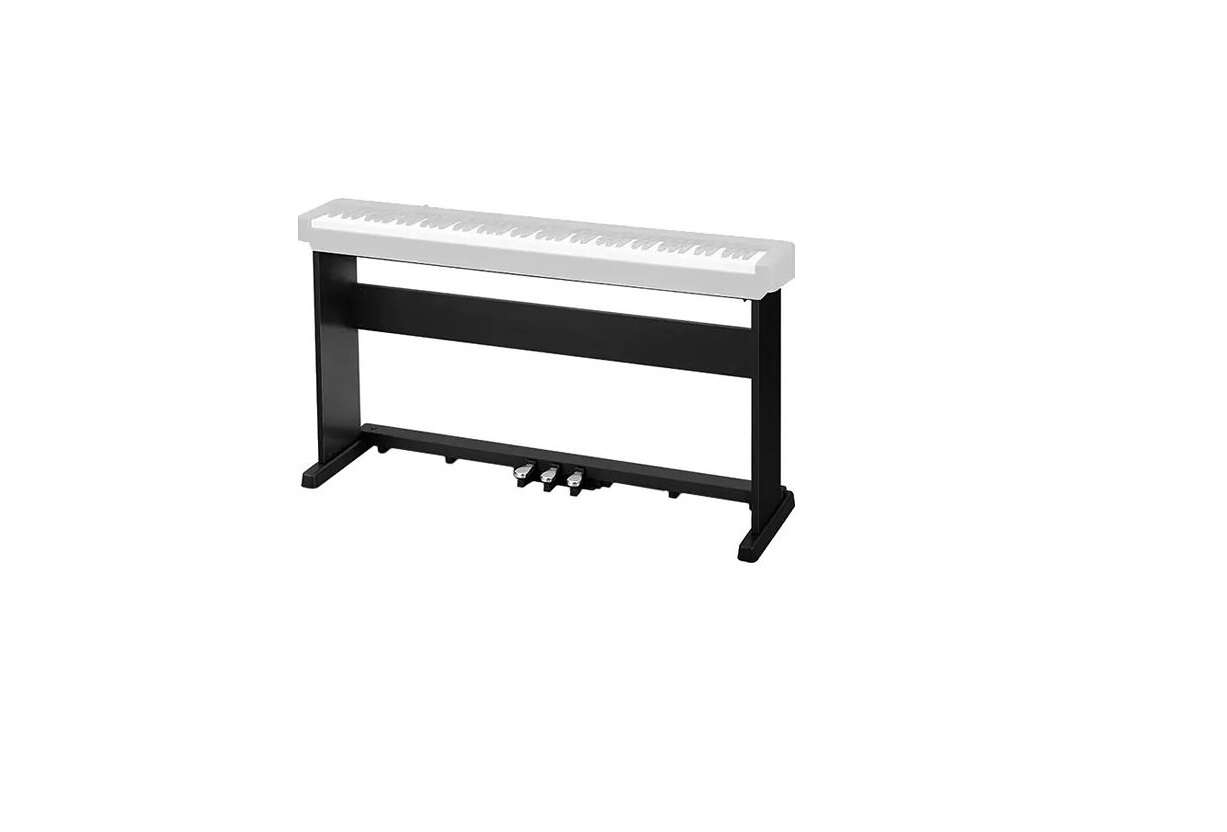
CASIO Piano Stand with 3 Pedals CS-470P User Manual

Safety Precautions
■ Symbols
Various symbols are used in this user’s guide and on the product itself to ensure that the product is used safely and correctly, and to prevent injury to the user and other persons as well as damage to property. Those symbols along with their meanings are shown below.
⚠ WARNING
This indication stipulates matters that have the risk of causing death or serious injury if the product is operated incorrectly while ignoring this indication.
⚠ CAUTION
This indication stipulates matters that have the risk of causing injury as well as matters for which there is the likelihood of occurrence of physical damage only if the product is operated incorrectly while ignoring this indication.
■ Symbol Examples

⚠ WARNING
Proper Location
Locate the piano and stand on a stable, level surface. Avoid unstable or uneven surfaces, which can cause the piano to fall or the stand to tip over, creating the risk of personal injury
⚠ CAUTION
Precautions for Piano Stand with 3 Pedals
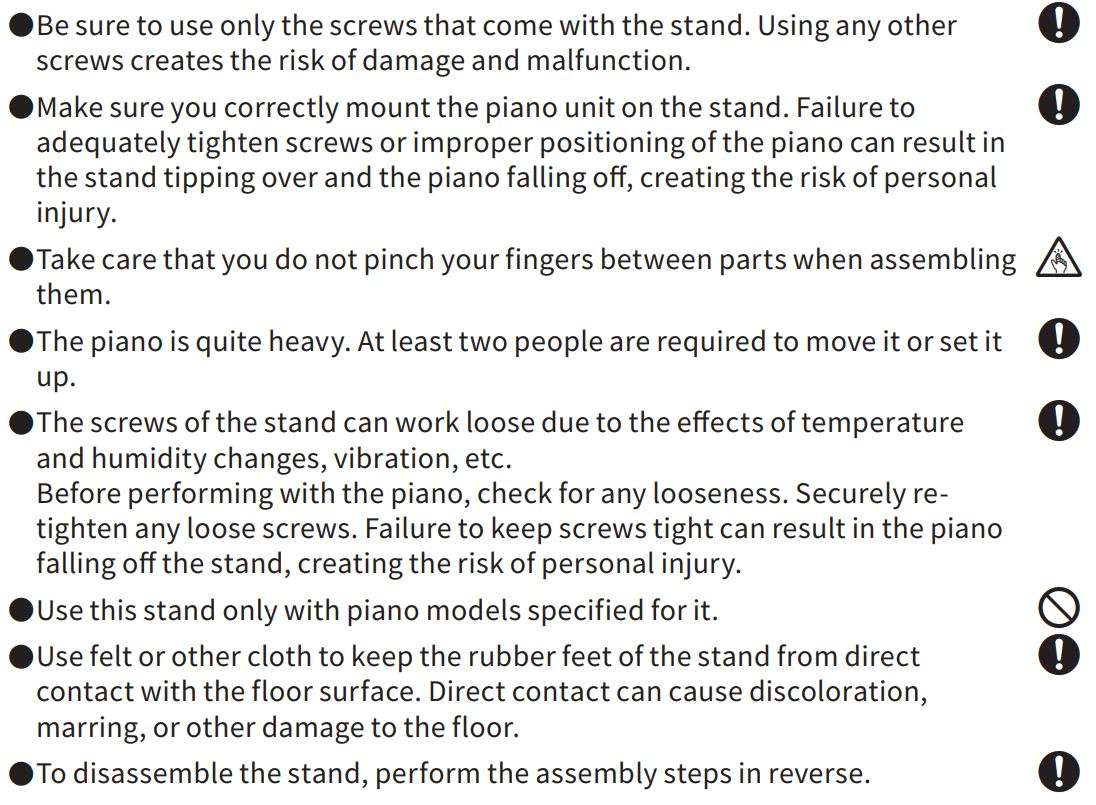
🚫 Heavy Objects
Never place any heavy object on top of the piano. Doing so can cause it to tip over or fall, creating the risk of personal injury
🚫 Keep Off
Do not sit on the piano or stand. Particular care is required when young children are present. Sitting on the piano or stand can cause it to tip over or break, creating the risk of personal injury.
Operational Precaution
- Unauthorized reproduction of this manual in its entirety or in part is expressly forbidden. All rights reserved.
- CASIO COMPUTER CO., LTD. shall not be held liable for any damages or losses or any claims by third parties arising from use of this product or this manual.
- The contents of this manual are subject to change without notice
⚠ CAUTION
- When installing the Pedal Unit onto the stand, take care that you do not pinch your fingers.
- This stand should be assembled on a flat surface.
Getting Ready
- This stand does not include any of the tools required for assembly. It is up to you to prepare a large Phillips head (+)scr ewdriver for assembly.
- Before starting assembly, check to make sure that you have all the parts shown below.
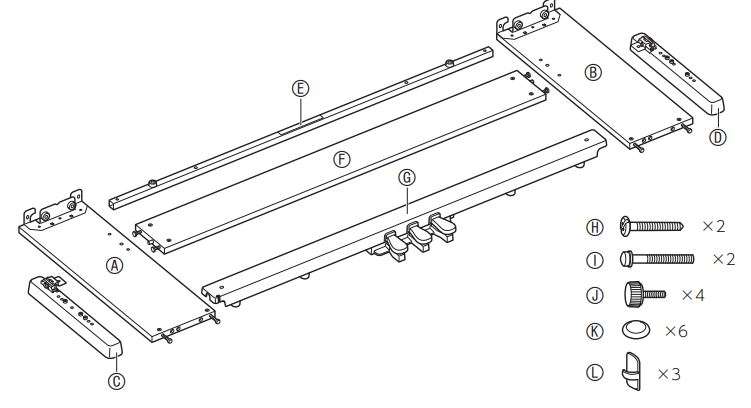
- (B) Side panels
- (D) Feet
- Reinforcement bar
- Back board
- Pedal unit
- Pedal unit attachment screws
- Reinforcement bar attachment screws
- Piano unit attachment screws
- Caps
- Clips
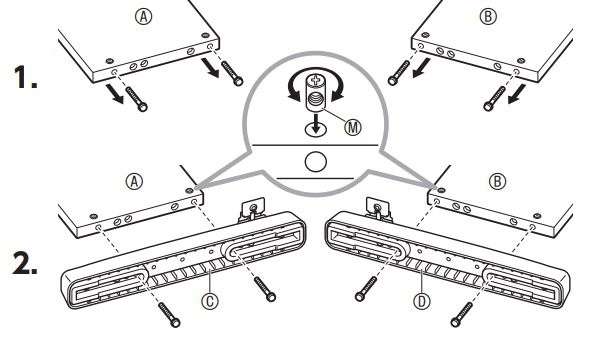
- Remove the four screws (two on each side) attached to the side panels (A) (B).
- Use the screws you removed to attach the feet (C),(D) to the side panels (A) (B).
⚠ Important!
- If you have trouble inserting a screw into a joint connector (M) screw hole, use a screwdriver to rotate the joint connector (M) and adjust its position.
- Trying to force screws to tighten while a joint connector (M) and turning screws are out of alignment can strip the threads of the screw.

- Remove the four screws from the back board (F).
- Use the screws you removed to attach the side panels (A) (B) to the back board (F).
• After attaching the side panels (A) (B) to the back board (F), cover the screw heads with caps (K).
⚠ Important!
- If you have trouble inserting a screw into the screw hole of a joint connector (M) embedded in the back board (F), use a screwdriver to rotate the joint connector (M) and adjust its position.
- Trying to force screws to tighten while a joint connector (M) and turning screws are out of alignment can strip the threads of the screw.
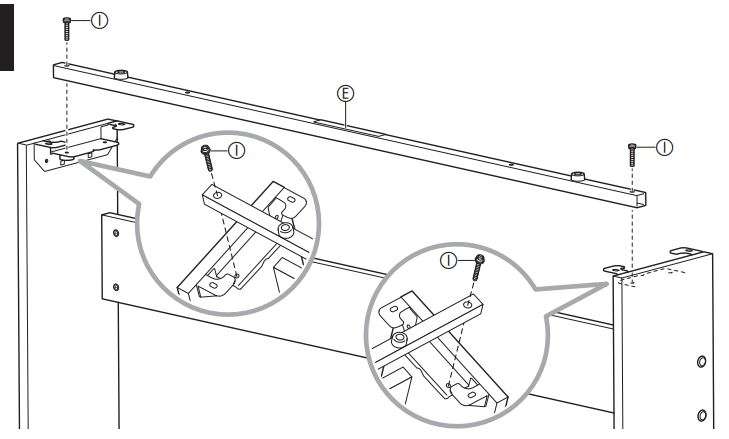
- Use the reinforcement bar attachment screws (I) to attach the reinforcement bar (E) to the stand.
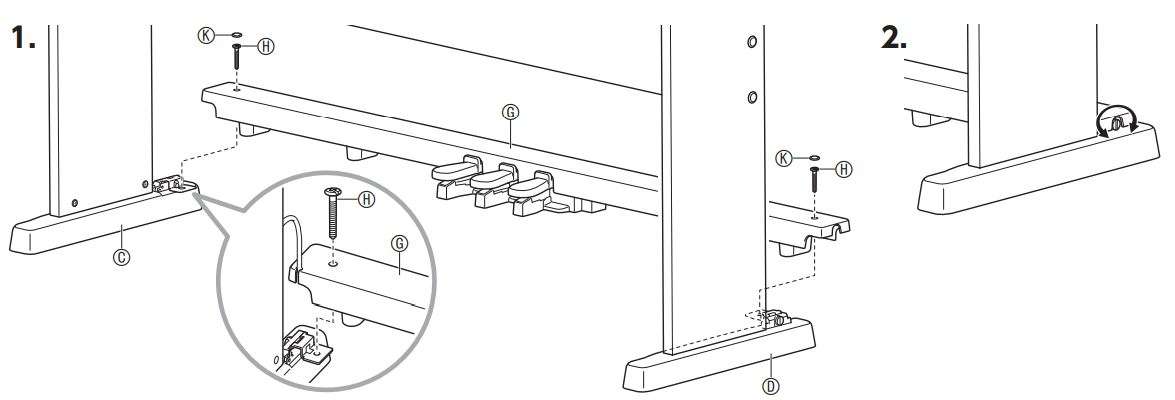
- Place the pedal unit (G) onto the feet (C),(D) and then secure it in place with two screws (G) (left and right).
• After attaching the pedal unit (G) to the stand, cover the screws (H) with caps (K). - After partially tightening the screws on the outside of the pedal unit (G), adjust the height of the pedal unit and then securely tighten the screws.
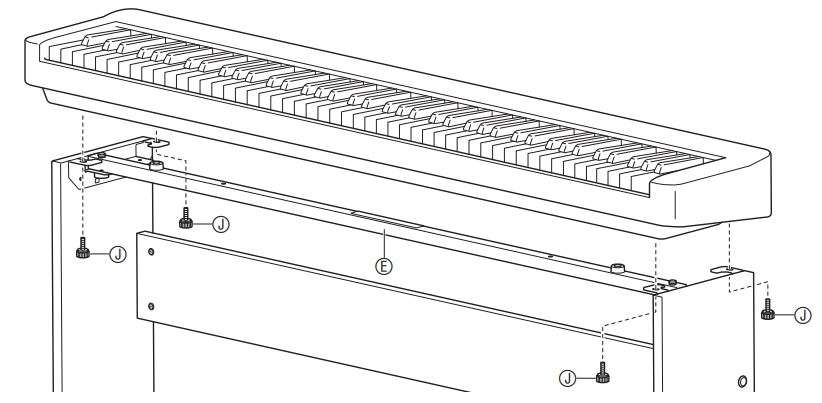
- While aligning the piano unit with the two protrusions on the reinforcement bar (E) of the assembled stand, place the piano unit on the stand.
- Next, use the piano unit attachment screws (J) to secure it to the stand.
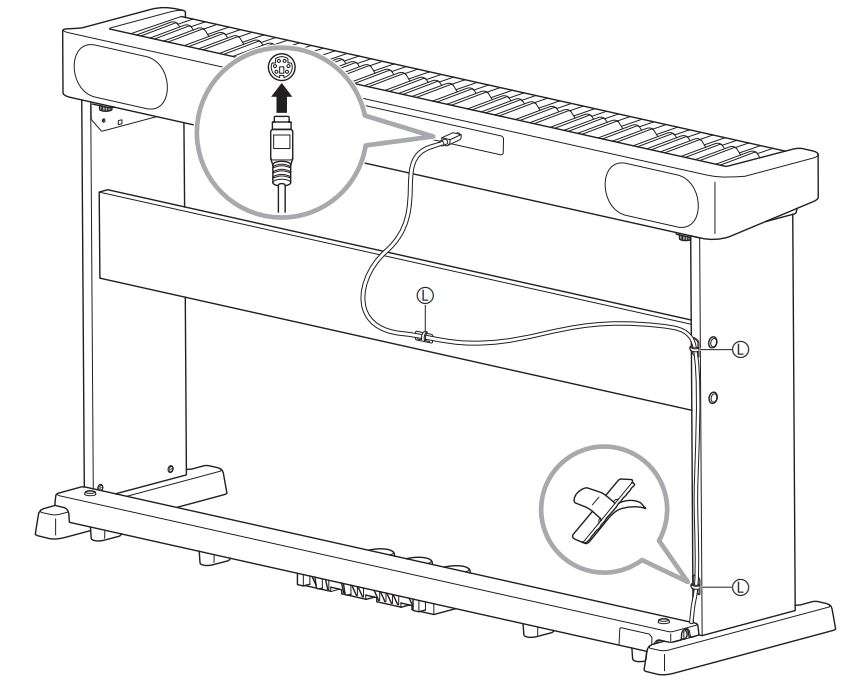
- Routing the pedal unit plug cord as shown in the illustration, plug it into the pedal jack on the back of the piano.
- Use clips (L) to secure the pedal unit cord to three locations on the stand’s back board and side panels.
■ Main Specifications
Pedal cord : 135 cm (53 1/8 inches)
Dimensions : 127.0 (W) × 37.0 (D) × 65.0 (H) cm
(50 × 14 9/16 × 25 9/16 inches)
Weight : Approximately 9 kg (19.8 lbs)
This recycle mark indicates that the packaging conforms to the environmental protection legislation in Germany.
![]() Manufacturer:
Manufacturer:
CASIO COMPUTER CO., LTD.
6-2, Hon-machi 1-chome, Shibuya-ku, Tokyo 151-8543, Japan
Responsible within the European Union:
Casio Europe GmbH
Casio-Platz 1, 22848 Norderstedt, Germany
www.casio-europe.com
![]() Manufacturer:
Manufacturer:
CASIO COMPUTER CO., LTD.
6-2, Hon-machi 1-chome, Shibuya-ku, Tokyo 151-8543, Japan
Responsible within the United Kingdom:
Casio Electronics Co.Ltd.
Harp View,12 Priestley Way, London, NW2 7JD, U.K.
www.casio.co.uk
CASIO COMPUTER CO.,LTD.
6-2, Hon-machi 1-chome shibuya-ku, Tokeo 151-8543, Japan
@2021 CASIO COMPUTER CO.,LTD.
Printed in China
Download PDF
CASIO Piano Stand with 3 Pedals CS-470P User Manual PDF Download
