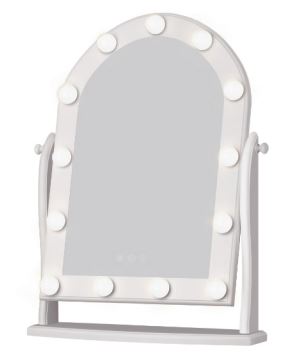
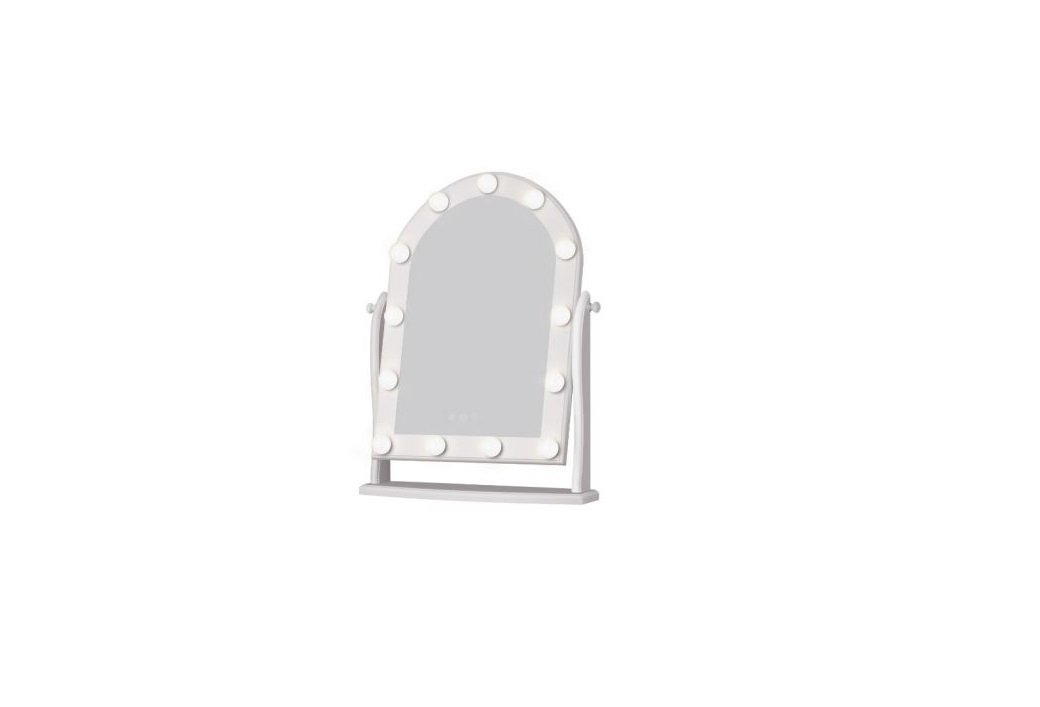
LUXFURNI Starry9 USB LED Makeup Mirror User Manual

FROM THE GM

It wasn’t so long ago when women use to hang their necklaces in their cabinet hooks and place their pearl earrings in wooden boxes and trays. It was the time when putting on makeup meant that one had to be under the beaming sun just to achieve that flawless look. Remembering where you placed that pair of vintage earrings you purchased from the flea market was such a hassle.
LUXFURNI, the finest jewelry cabinet maker was born out of this idea. Capturing the evolving needs of women over the years empowered us to create products that set an industry standard. Jewelry cabinets and makeup mirrors designed to understand the million small details that women want.
These fine details has ushered a new era of design by combining modern innovations with classic design elements. From hardwood jewelry cabinets that empower women to Hollywood makeup mirrors that make you feel like a star, each LUXFURNI product tells a story. Discover yours and enjoy each step of your journey towards luxury with a true masterpiece.

INFORMATION & WARRANTY
CUSTOMER SERVICE
If you are having difficulty with your product and require support, please contact [email protected]
COPYRIGHT
All materials in this instruction manual are copyrighted by LUXFURNI. Any unauthorized use may violate worldwide copyright, trademark, and other laws.
PRODUCT DISPOSAL INFORMATION
For electrical products sold within the European Community, at the end of the electrical product’s useful life, it should not be disposed of with household waste. Please recycle where facilities exist.
Contact your local authority for details of collection schemes in your area. In all circumstances:
- Do not dispose of in domestic waste.
- Do not incinerate.
![]()
WARRANTY
Please retain a proof of purchase receipt or statement as proof of the purchase date. The warranty only applies if the product is used solely in the manner indicated in the Warnings page of this manual, and all other instructions have been followed accurately. Any abuse of the product or the manner in which it is used will invalidate the warranty.
Returned goods will not be accepted unless repackaged in its original packaging and accompanied by a relevant and completed returns form. This does not affect your statutory rights. No rights are given under this warranty to a person acquiring the product second-hand or for commercial or communal use.
CONNECT & SUPPORT
For any questions, please contact us with your order ID. We are
always ready to serve you.
📧 : [email protected]
📞 : +1 424-512-2022
Share your shopping experience with everyone.
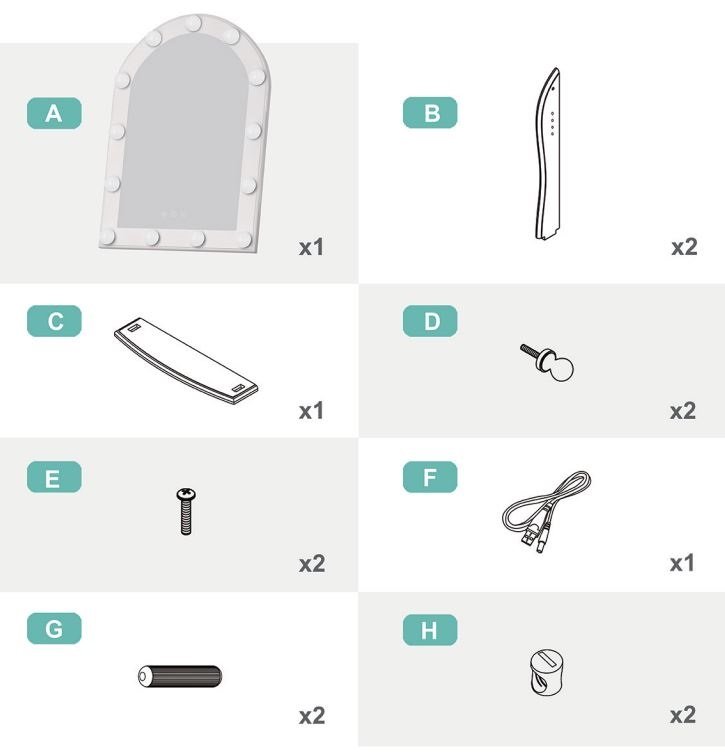
COMPONENTS
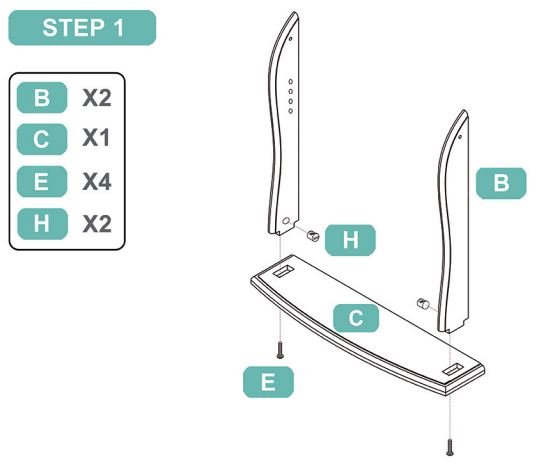
ASSEMBLY STEPS- FOR DOOR MOUNTING
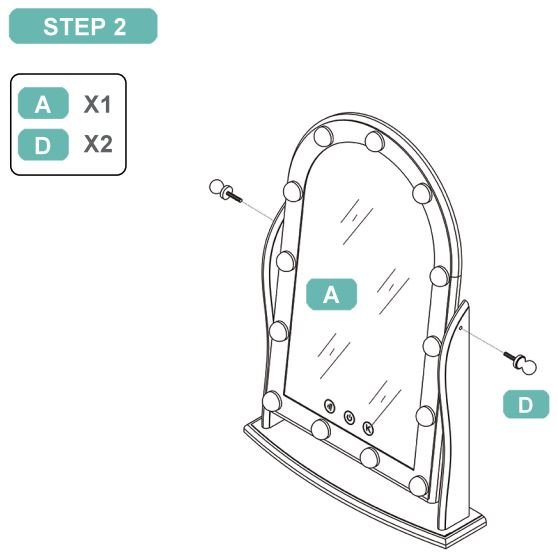
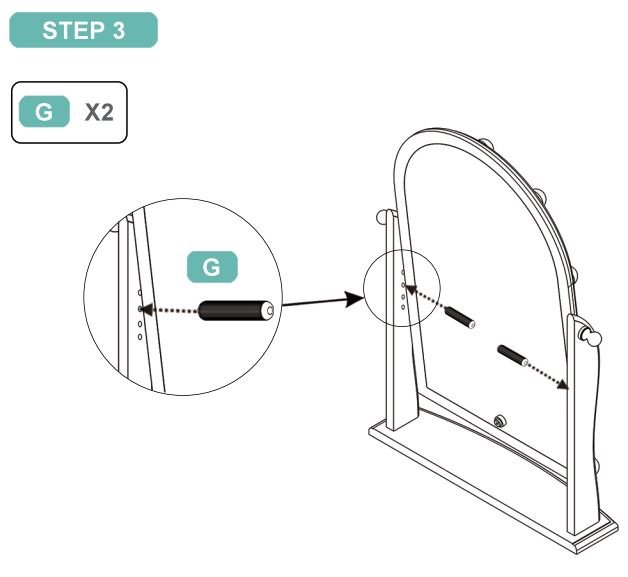

- Plug the USB cable into the back of the minor and plover source (Output of adaptor needs to be 5V 2A)

- Press the middle touch sensor located at the front to Power on the LED Ligh1s
- Press the left button @) to select the brightness of your choice. Press and hold after covering on. This action will initiate LED lights to change brightness.
- Press the right button (K) to select your desired color temperature or press and hold to change color temperature gradually.
- If the touch switch is not functioning properly, reset the chip by removing power for a few seconds only.
