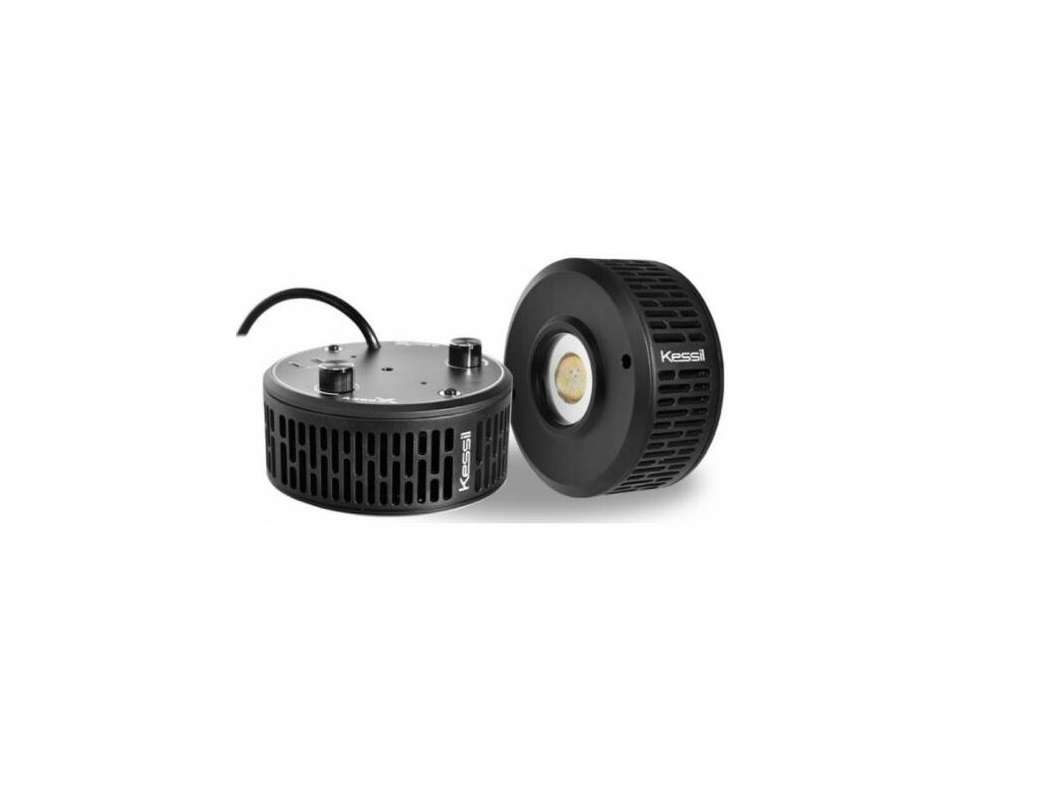
Kessil Controllable LED Aquarium Light A360X User Manual
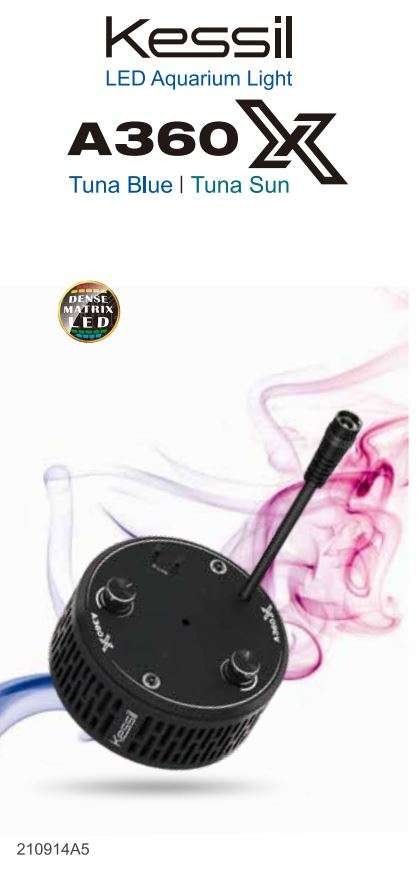
Inside the Box

Parts Diagram
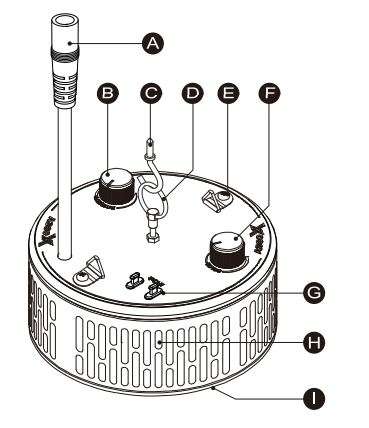
- Power Cord
- Intensity Tuning Knob
- Screw Hook
- Hanging Ring
- Hanging Bracket
- Color Tuning Knob
- K-Link
- Venting Holes
- Lens
Safety Instructions
- DO NOT use a power adapter that is out of the specifications. This is a fire hazard and may lead to unit failure.
- DO NOT use outdoors. This unit is intended for indoor use only.
- DO NOT expose unit to an extremely humid environment or submerse unit in water. This may lead to unit failure.
- DO NOT place working illuminator in close contact with any objects. This may cause objects to heat up and the unit to overheat.
- KEEP Lens (I) away from sharp objects. Sharp objects may break the lens and lead to unit failure.
- DO NOT cover or place objects on the power adapter. Power adapter should not be contained in an airtight space.
Getting Started
(1) Power
Connect the A360X to the power adapter and plug it into a wall outlet. Turn the Intensity Tuning Knob (B) to the right to turn on the light.

(2) Control
- Turn the Intensity Tuning Knob (B) to adjust the brightness of the fixture.
- Turn the Color Tuning Knob (F) to adjust the light to the desired color.
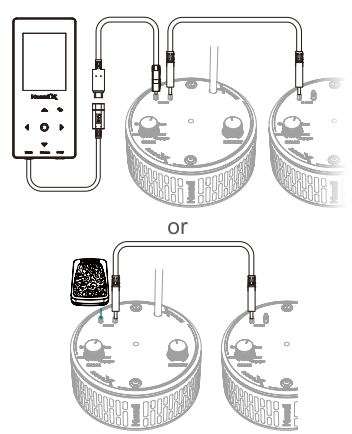
- A360X can be connected and controlled through Kessil Spectral Controller X with a Type-C USB Cable (K-Link Cable), or through the WiFi Dongle.
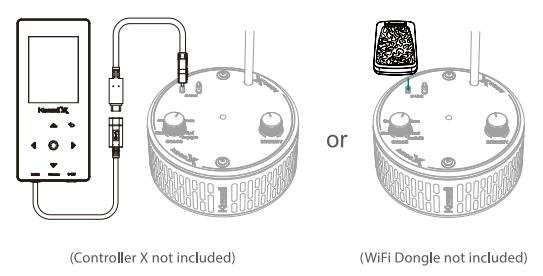
(3) Controlling Multiple A360X
- Connect two or more lights with K-Link Cables as shown in the image.
- Multiple A360X lights (Tuna Blue, Tuna Sun, and Refugium) can be controlled together by either manually, an external controller, or the WiFi Dongle.
- When controlling without an external controller or WiFi Dongle, tuning controls on any light control all other lights in chain.
(4) Mounting
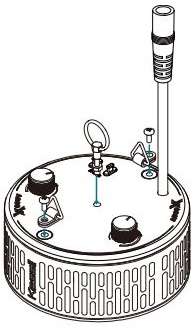
- Screw the Hanging Ring (D) into the center screw hole.
- Hang the light with the two Screw Hooks (C) and the two Hanging Brackets (E).
- To install the Hanging Brackets (E), remove the screws on the A360X, use the same screws to secure the fasteners with triangular rings onto the light fixture.
Maintenance
- Keep the air intake holes, Venting Holes (H), and fan clear of dust. To clean the fan, unplug the unit and insert the tip of a CO2 dust blower (or similar dust blower) in one of the Venting Holes (H) on the unit’s outer shell. Hold and spray. You can also gently vacuum out the light through the venting holes.
- Keep the Lens (I) clean. If the lens becomes contaminated with water, dust, or other particles, unplug the unit and clean the lens with isopropyl alcohol. Wet a cotton swab or a napkin in isopropyl alcohol, gently wipe the surface of the lens, and let it dry.
- Keep plastic covers for K-Link ports plugged in when the ports are not in use. Keep the ports clean all the time.
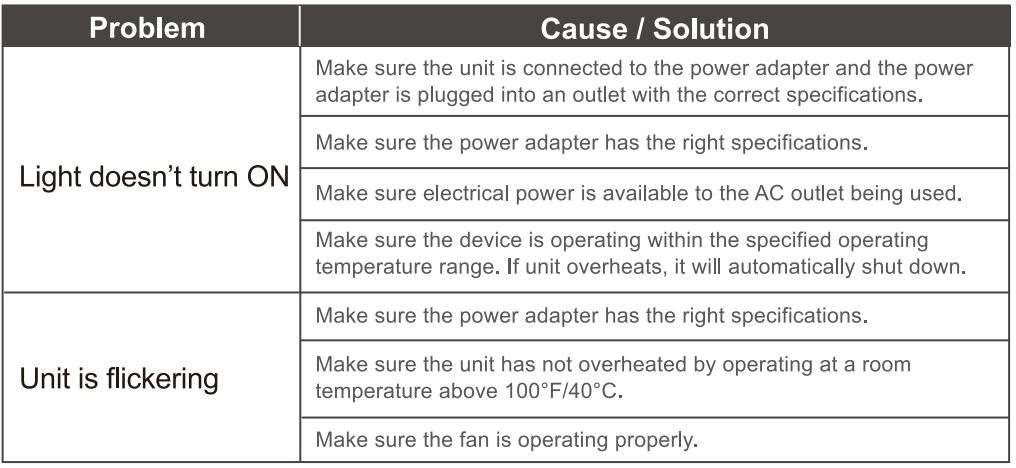
Troubleshooting Guide
Please make sure to perform maintenance before doing any troubleshooting.
Product Specification


Facebook
YouTube
Twitter
Instagram
Kessil.com
Kessil Lighting
A DiCon Brand
1689 Regatta Blvd, Richmond, CA 94804
(510) 620-5250
www.kessil.com
This is a LED light source emitting 40 % or more of total radiation power of the range 250-800 nm in the range of 400-480 nm. and intended for coral growth.
Download PDF
Kessil Controllable LED Aquarium Light A360X User Manual PDF Download
