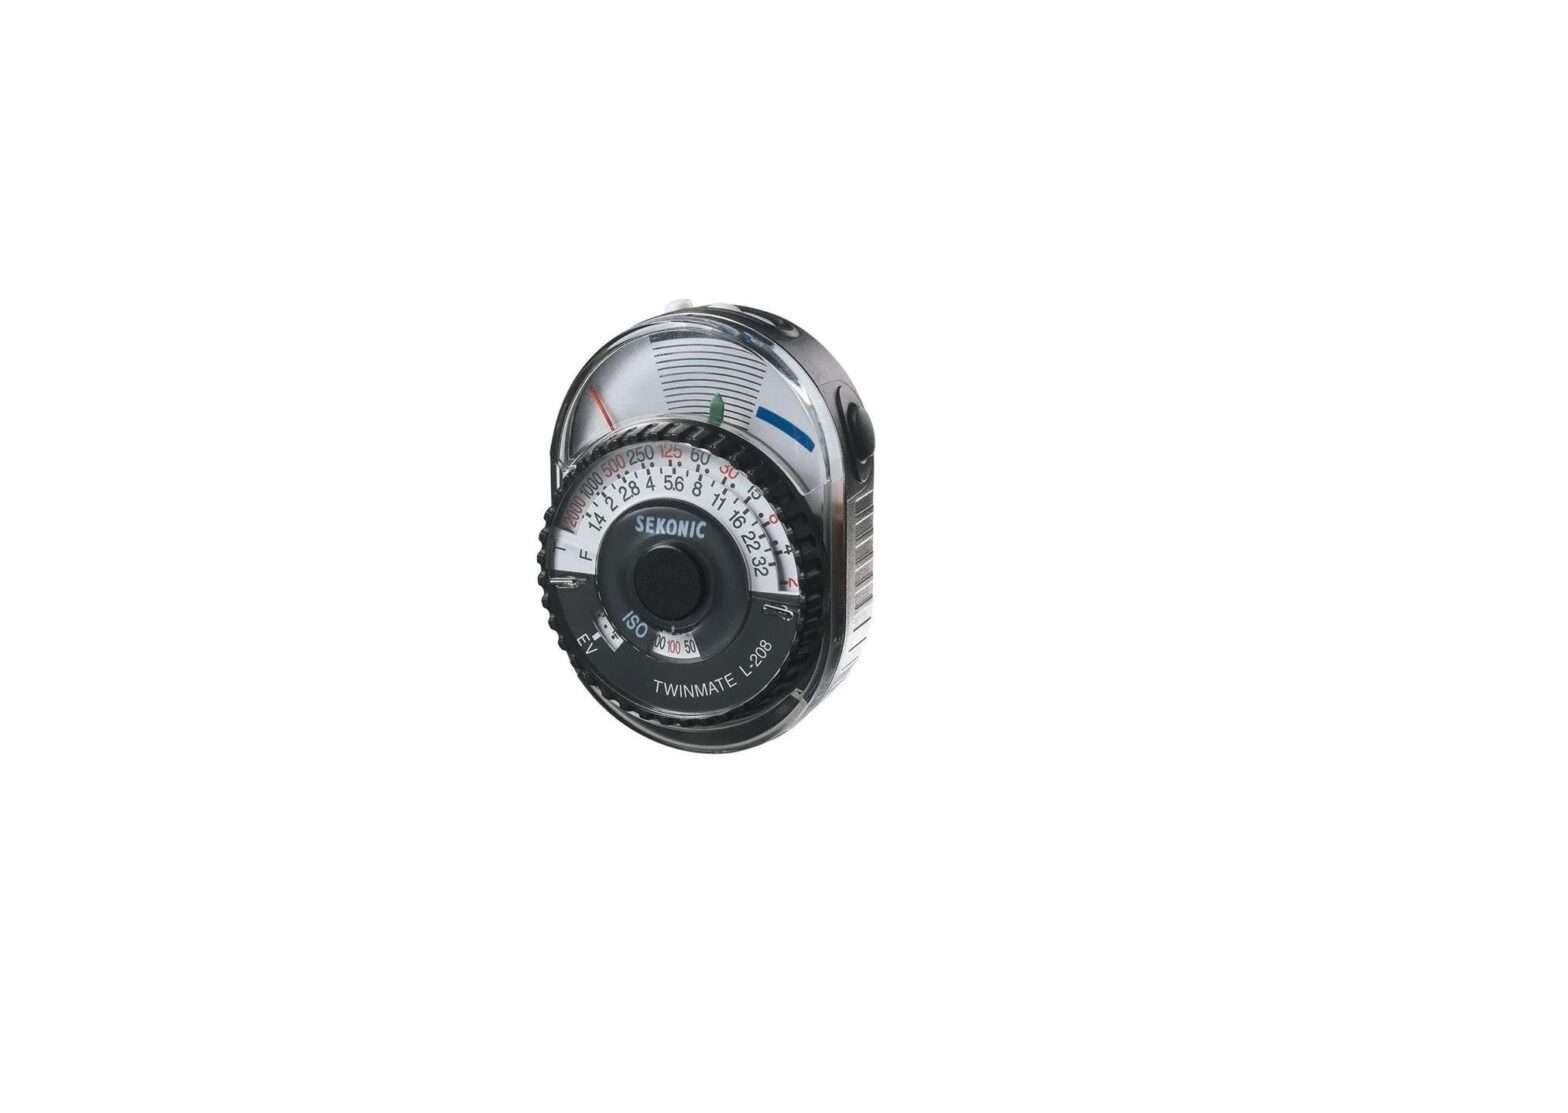
Sekonic L-208 TWINMATE Analog
Light Meter User Manual
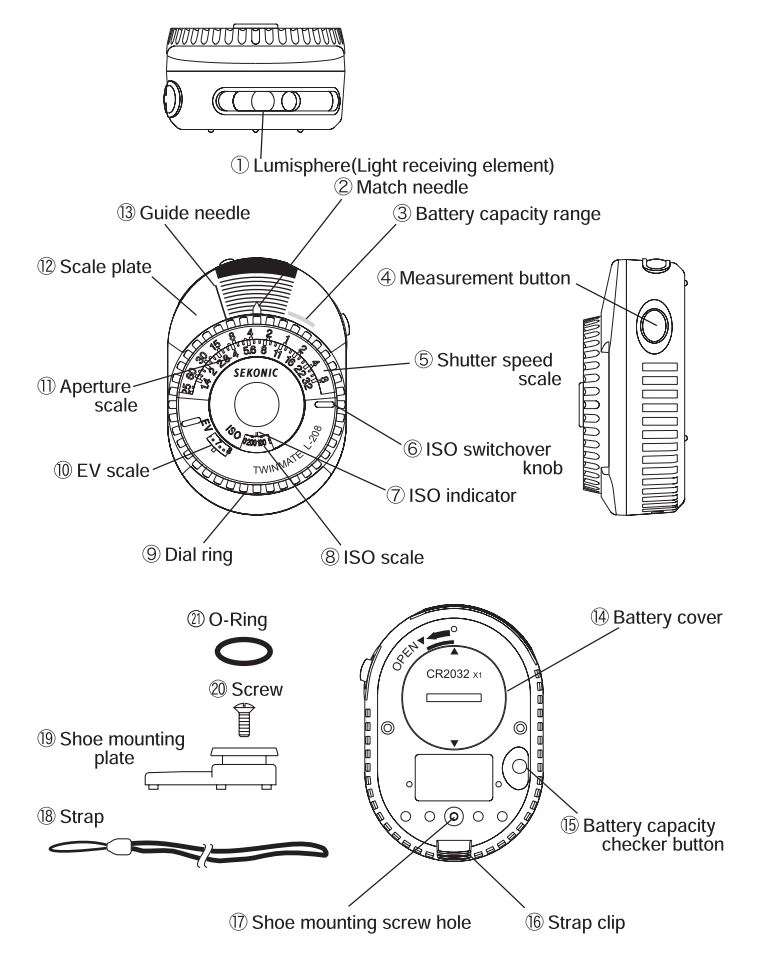
Parts
- Attaching the strap
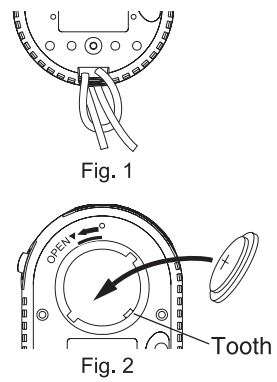
Pass the end of the strap (18) through the strap clip (19) and connect it to the ring at the opposite end of the strap. - Inserting the battery
- Use one 3V coin-type lithium battery, model CR2032.
- Rotate the battery cover to the left with a coin or other tool and remove battery cover (14) .
- Position the battery with the”+” side facing up and insert it so that it slides under the tooth.
- Align the battery cover with the “▼” mark on the body of the unit and rotate it to the right until a secure click is heard.
• Be sure to remove the battery if it is not used for an extended period of time.
• Remember to take a spare battery with you on long trips and similar occasions.

- Confirming battery strength
- If the battery strength drops below the rated voltage, guide needle (13) on the exposure meter will not display values correctly; therefore, confirm the voltage prior to use by pressing the battery capacity checker button (15) on the back of the unit.
- It is possible to continue using the battery as long as the guide needle is within battery capacity range (3).
- Replace the battery if it is not within the battery capacity range.
- Setting the ISO film sensitivity
Rotate ISO switchover knob (7) and set film speed being used in ISO indicator (7) . - Switching between incident light and reflected light Slide the lumiphore (1) into the proper position for the type of light
being measured. Fig. 3 shows the condition for incident light and Fig. 4 shows that for reflected light - Light receiving angle (for reflected light)
The angle of coverage is 33. (approx. 73 mm) corresponds to approx. 70% of angle for 50 mm standard lens of 35 mm SLR camera (approx. 46. ). Make measurements using the guideline displayed in scale plate (12) as a guide.
• Measurement values will be different if you measure a subject that is not uniform with a meter having a different angle of coverage. - Measurement
- In either the incident light or reflected light, when measurement button (4) is pressed, the guide needle will oscillate and, when the button is released, it will retain its position for about 15 seconds; rotate dial ring (9) during that time and align match needle® with the guide needle.
• Please press and hold the measurement button for over one second due to the feature of guide needle retaining.
• If you press the measurement button while the guide needle is on hold, a new measurement value will be displayed. - Read the combination when the shutter speed scale (5) coincides with the aperture scale (11), select a combination that is the most suitable for the subject and set the camera accordingly.
- Reading the scales

- In either the incident light or reflected light, when measurement button (4) is pressed, the guide needle will oscillate and, when the button is released, it will retain its position for about 15 seconds; rotate dial ring (9) during that time and align match needle® with the guide needle.
- Incident light measurements
In this mode, measurements are taken by directing the lumiphore CD (light sensor) directly at the camera’s lens from the subject’s position.(Fig. 6) Since only the light (illumination) striking the subject is measured, the reflection factor of the subject is not effected and the value displayed on the exposure meter is the standard exposure value.
• This is best for photographing people, flowers and similar objects.

- Reflected light measurements
In this mode, measurements are taken by directing the light receiving element (uncovered) at the subject from the position of the camera; the proper value is determined by measuring the light reflected (brightness) from the subject.(Fig. 7) Since the measurement is effected by both the incident light and the reflection factor of the subject, compensation of exposure is necessary if the reflection factor of the subject is extremely high or low.
• This is best for photographing scenery, and other light emitting objects.

- Shoe mounting
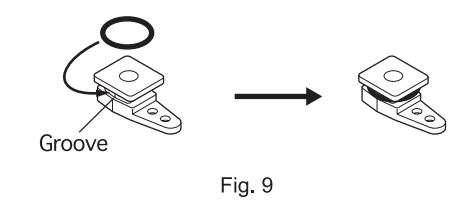
The accessory shoe is mounted using shoe mounting plate (19) . The mounting location of the shoe mounting plate is variable and therefore mount it correctly for the camera that you are using.
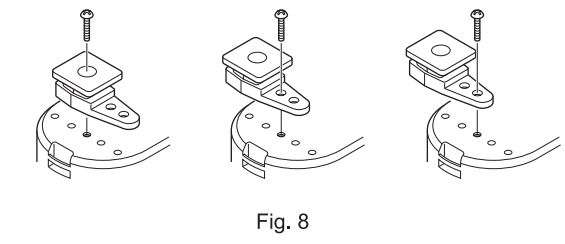
In case a shoe mounting plate is not fixed to your camera, please put an 0-ring ® in the groove of shoe mounting plate.
Please note the following to assure safe use of the product.
![]() Warning: This is a warning mark indicating that death or serious injury of the user could potentially result if it becomes impossible to use this product properly.
Warning: This is a warning mark indicating that death or serious injury of the user could potentially result if it becomes impossible to use this product properly.
![]() Warning:
Warning:
- Be sure to store the unit in a safe place out of reach of infants and children in order to avoid asphyxiation caused by the strap wrapping around the neck.
- Be sure to store the unit and batteries in a safe place out of reach of infants and children to avoid the danger of having them swallow the battery. Immediately contact a physician if the battery is swallowed.
- The rupturing of the battery could be the cause of fire, injury or contamination of the surroundings; do not by any means dispose of the battery in fire, short or dismantle it or subject it to heat.
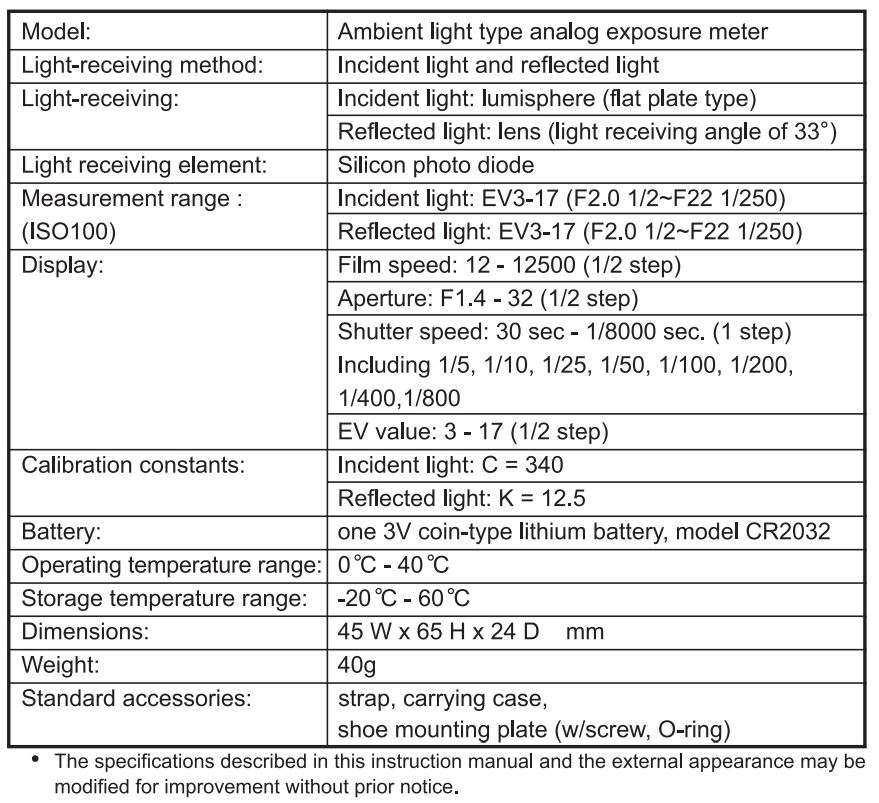
Specifications
SEKONIC CORPORATION
7-24-14, OIZUMI-GAKUEN-CHO, NERIMA-KU,
TOKYO 178-8686 JAPAN
TEL: +81(0)3-3978-2335 FAX: +81(0)3-3978-5229
Download PDF
Sekonic L-208 TWINMATE Analog
Light Meter User Manual PDF Download
