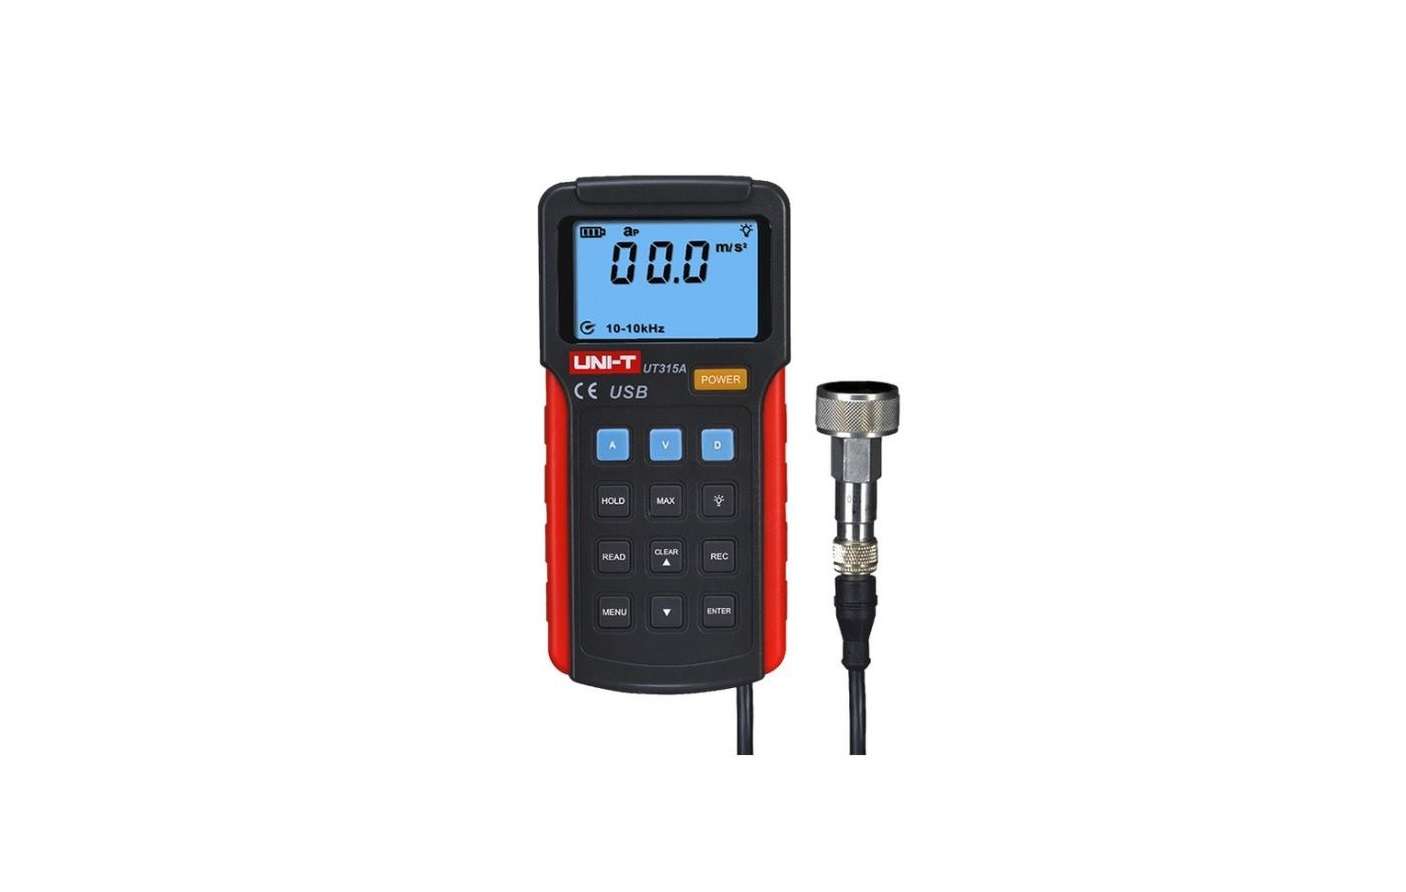
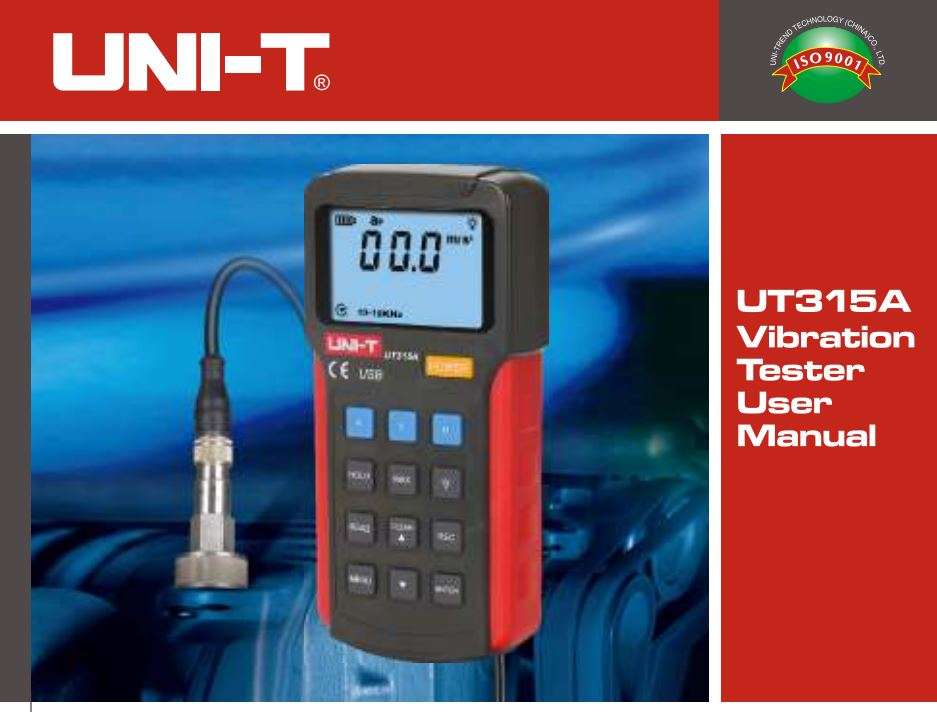
UNI-T Vibration Tester UT315A User Manual
Preface
Thank you for purchasing the new vibration tester. In order to use this product safely and correctly, please read this manual thoroughly.
After reading this manual, it is recommended to keep the manual at an easily accessible place, preferably close to the device, for future reference.
Limited Warranty and Liability
Uni-Trend guarantees that the product is free from any defect in material and workmanship within one year from the purchase date. This warranty does not apply to damages caused by accident, negligence, misuse, modification, contamination or improper handling. The dealer shall not be entitled to give any other warranty on behalf of Uni-Trend. If you need warranty service within the warranty period, please contact your seller directly.
Uni-Trend will not be responsible for any special, indirect, incidental or subsequent damage or loss caused by using this device.
I. UNI-T Vibration Introduction
The UT315A vibration tester is used for vibration measurement of mechanical equipment, especially of rotating and reciprocating machinery. It is widely applied to mechanical manufacturing, electric power, metallurgy, and other industrial measurement. The tester is an ideal tool for equipment condition monitoring.
II. Features
- Large LCD for visual display of measured values and measurement status
- Acceleration, velocity and displacement measurement
- Auto switch of vibration frequency characteristics
- High-sensitivity probe for accurate measurement
- Equipped with a long probe and a short probe, for measurement in various places
- Equipped with a magnetic chuck, for testing when it is not convenient to hold
- Low battery indication
- Auto power off
- LCD backlight
- Max value display
- USB communication
- Data hold
- Data storage
Ill. Configuration
Tester ———– 1 pc
9V battery ———– 1 pc
User manual ———– 1 pc
Long probe ———– 1 pc
Short probe ———– 1 pc
Magnetic chuck ———– 1 pc
IV. External Structure
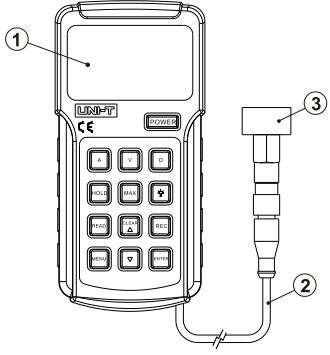
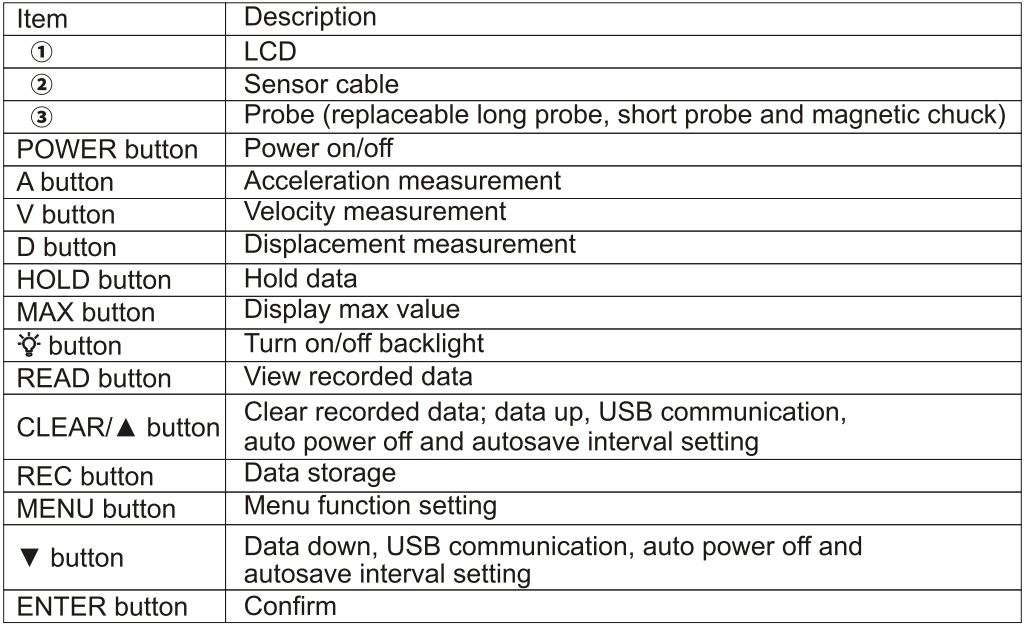
V. LCD Description
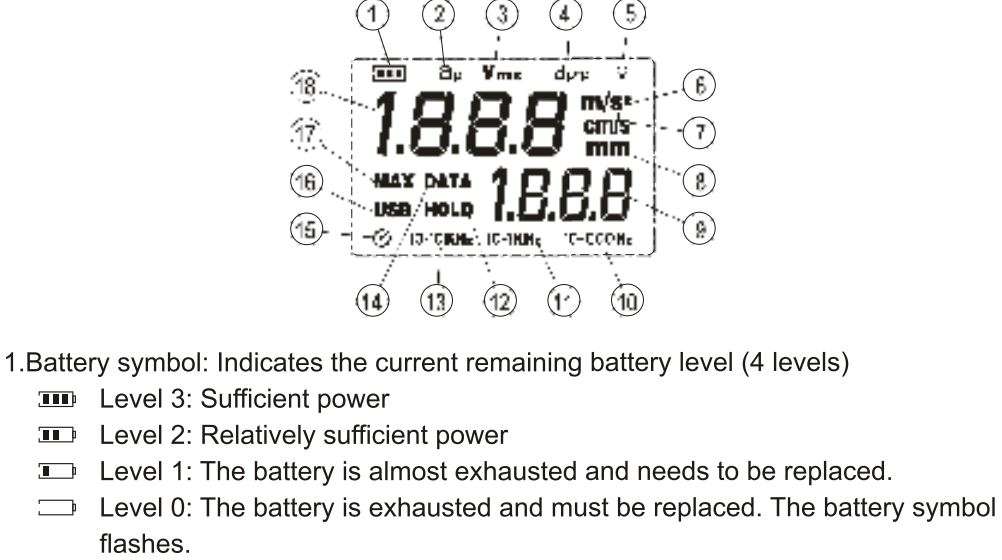
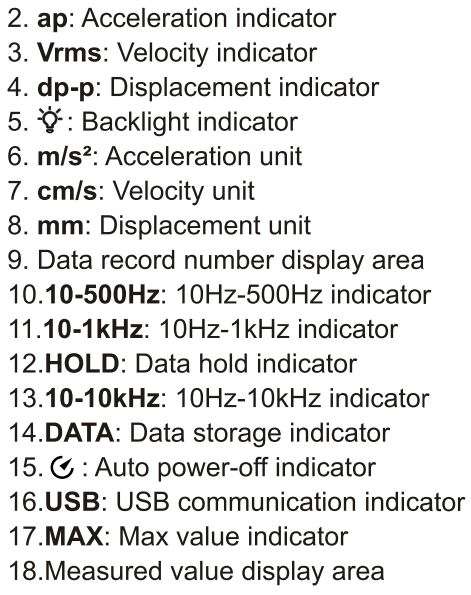
VI. Test Method Selection
Please select a proper test method from the following according to the actual situation.
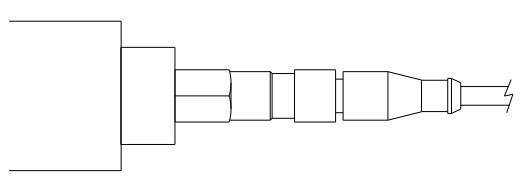
- Use short (S) probe to measure: The probe is mounted on the tester. This method is applicable to vibration measurement in wide areas to acquire good response values,
as shown below.
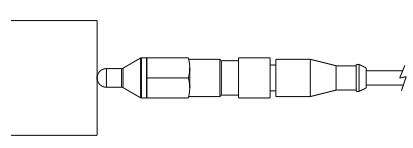
- Use Long (L) probe to measure: The probe is an accessory in the packaging box, which is mainly used in narrow or special object areas with quick response, as shown below.

⚠ Note: The long (L) probe is only suitable for low frequency measurement.
When the frequency exceeds 1 kHz in acceleration measurement, please replace it with the short (S) probe. - Use magnetic chuck to measure: The chuck is an accessory in the packaging box, which is mainly used in areas of flat iron objects, such as elevators, as shown below.

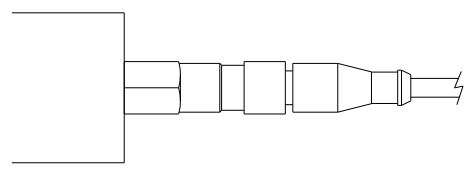
⚠ Note: When using magnetic chuck to measure, attachment position and firmness of attachment may cause differences in measurement results. - Remove hardware probe to measure: This method is applicable to vibration measurement of flat object surfaces to acquire stable data, as shown below.
VII. Battery Installation
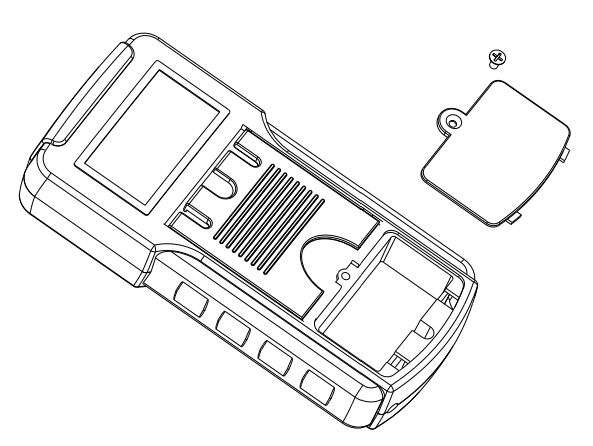
To install the battery:
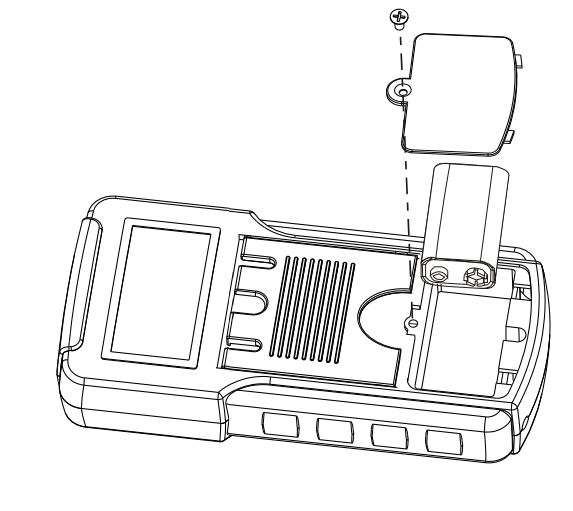
- Unscrew and remove the battery cover, as shown below.

- Put the 9V battery into the battery compartment, observing the polarity. Secure the battery cover and tighten the screw, as shown below.
VIII. Power On/Off and Battery Status Check
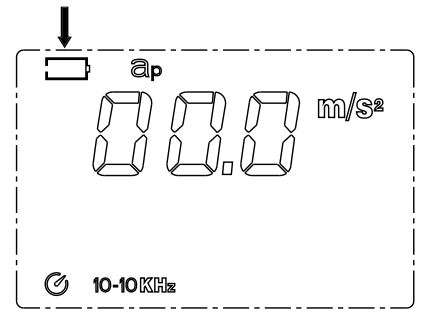
- Long press the POWER button to turn on the tester. It defaults to acceleration measurement and the auto power off function is on. If the LCD displays the ” 🔋 ” symbol, please replace the battery timely, as shown below.
IX. Operating Instructions
- Acceleration Measurement
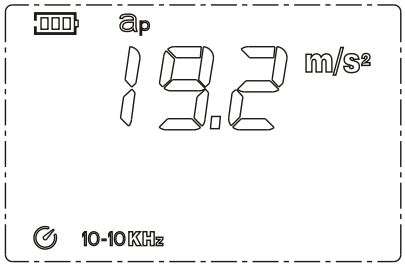
- Short press the A button to enter the acceleration measurement mode (by default), and the LCD will display the “ap”, “10-10kHz” and “m/s2” indicators.
- Measure the object under test with the selected test method, and the LCD will display the measurement result in the measured value display area, as shown below.

- Velocity Measurement
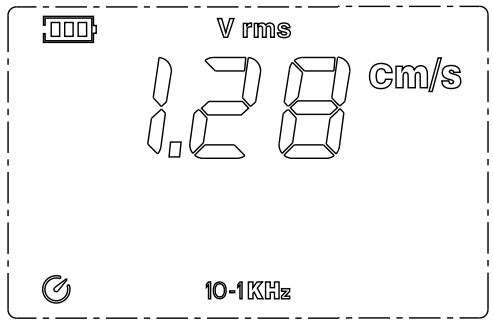
- Short press the V button to enter the velocity measurement mode, and the LCD will display the “Vrms”, “10-1kHz” and “emfs” indicators.
- Measure the object under test with the selected test method, and the LCD will display the measurement result in the measured value display area, as shown below.

- Displacement Measurement
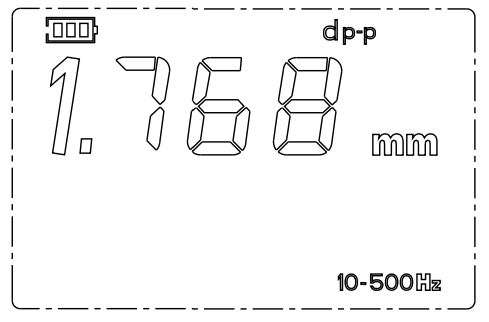
- Short press the D button to enter the displacement measurement mode, and the LCD will display the “dp-p”, “10-500Hz” and “mm” indicators.
- Measure the object under test with the selected test method, and the LCD will display the measurement result in the measured value display area, as shown below.

- Max Value Display
Short press the MAX button during measurement. The LCD will display the “MAX” indicator and display the max measured value in the data record number display area. Short press the MAX button again to exit max value display. - Data Hold
Short press the HOLD button during measurement. The LCD will display the “HOLD” indicator and hold the current measured value in the measured value display area. Short press the HOLD button again to exit data hold. - Backlight On/Off
Short press the 💡 button during measurement. The LCD will display the “💡” indicator, and the backlight will be on. Short press the 💡 button again to turn off the backlight. - Data Storage
- Manual data storage: Short press the REC button during measurement. The LCD will display the “DATA” indicator, and the current measured value will be stored in the latest unrecorded location. The “DATA” indicator disappears after about 0.5s. Short press the REC button again to enter the data storage for next location.
- Auto data storage: Long press the REC button during measurement. The “DATA” indicator on the LCD will flash continuously and the measured values will be stored at the set intervals (refer to Menu Function Setting). If the count of stored data exceeds the max record count (1999) of the tester, it will exit data storage automatically.
Note:
If 1999 sets of data are stored, the data needs to be cleared before continuing storage. Manual data storage shares the record count with auto data storage.
- View Recorded Data
Short press the READ button to view recorded data.- If there is no recorded data, the LCD will display “—” both in the measured value display area and data record number display area. The tester returns to the measurement interface automatically after about 0.5s.
- If there is recorded data, the last recorded data and record number will be displayed automatically. At this time, the tester can only return to the measurement interface by manual.
a. Use the ▲ or ▼ T button to view the record number and its corresponding recorded data. Short press to view slowly and long press to view quickly.
b. Short press the REC button to make the display record increase by 100. If the record count is less than 100 or exceeds the max record count (1999), the first record number and its corresponding recorded data will be returned, for quick viewing of the data.
c. Long press the REC button until the first record number and its corresponding recorded data is returned to quickly return to view the data. Short press the READ button again to exit.
- Clear Recorded Data
Method 1: Press and hold the CLEAR and POWER buttons simultaneously to turn on the tester, release the POWER button after the full display, and release the CLEAR button after the LCD displays “CLR”.
Method 2: Restore factory settings (refer to Menu Function Setting) - Menu Function Setting
Short press the MENU button to enter the menu function setting, and short press the ENTER button to switch between the menu setting interfaces. If the tester is turned off in setting menu, the menu state will be saved automatically.- Short press the MENU button to enter the USB function setting interface. The default state is USB 0, which indicates USB communication is off (refer to USB Communication).
Use the ▲ or ▼ button to turn on/off the USB communication. USB 1 indicates the USB communication is on.
a. If the USB 1 is set in the USB function setting interface, the READ button can be short pressed to send the stored data to the PC. Buttons can only be operated after the completion of the transmission.
b. If the USB 1 is set, the LCD will display the “USB” indicator in the measurement interface and the data will be sent to the PC in real time.
When the USB communication is on, the auto power off function is off. - In the auto power off function setting interface, use the ▲or ▼ button to turn on/off the auto power off function. APO O indicates the function is off while APO 1 indicates the function is on. If the function is on, the tester will automatically power off after about 10 minutes of no operation.
- In the autosave interval setting interface, the LCD displays the setting time, “DATA” indicator and “rEC”. Use the ▲ or ▼ button to set the autosave interval. Short press to adjust it by 1 s and long press to adjust it quickly. The interval can be set from 0.5s to 255s.
- In the factory reset interface, the LCD displays “dEF ?”. Short press the MENU button to restore factory settings and return to the measurement interface, or short press the ENTER button to exit the menu function setting and enter the measurement interface.
- Short press the MENU button to enter the USB function setting interface. The default state is USB 0, which indicates USB communication is off (refer to USB Communication).
Default execution for factory reset: USB 0, APO 1, autosave interval of 60s, clearing all recorded data
X. USB Communication
- Download the PC software of UT315A Vibration Tester from the official website of Uni-Trend (refer to UNI-T Documents Download Operation Guide), and install it
according to the installation instructions. - Run the PC software and connect the USB cable to the PC.
- Data can be viewed and analysed by the PC software. Regarding the use of the PC software, users can retrieve the Software User Manual from the Help option of the operation interface.
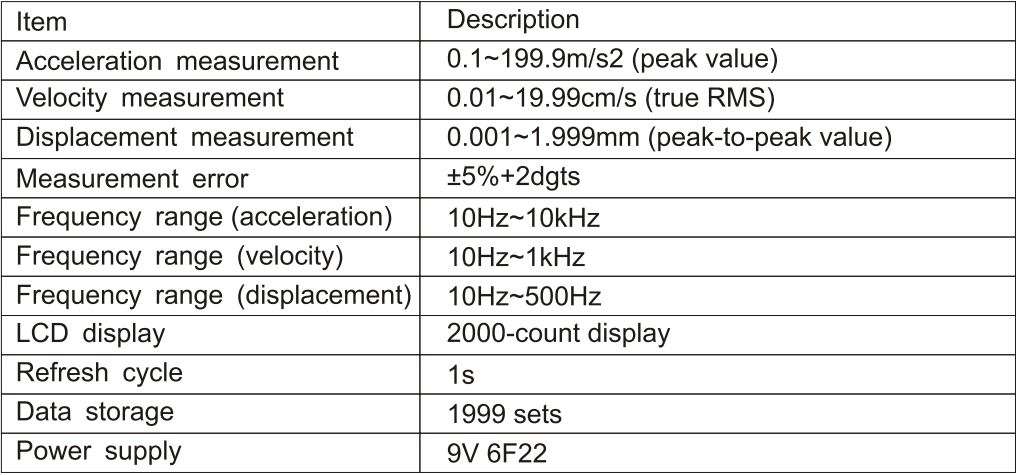
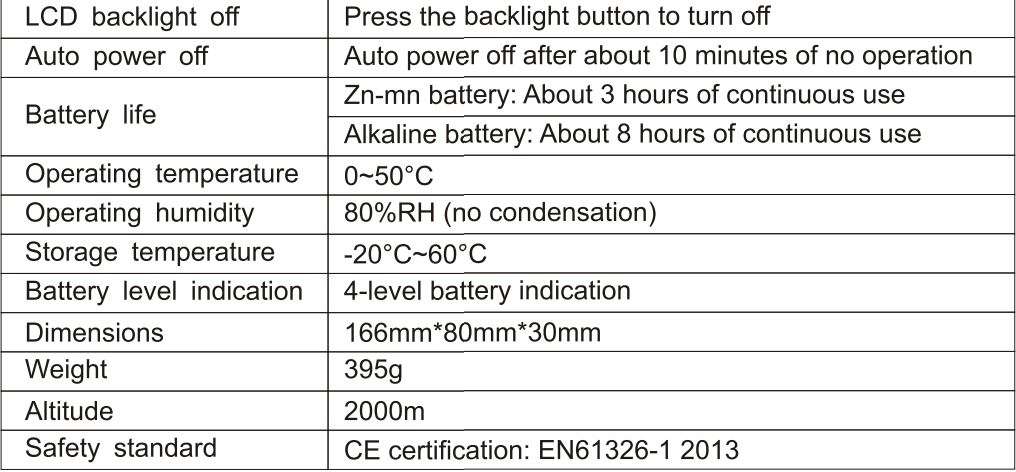
XI. Specifications
XII. Maintenance
- The UT315A vibration tester is precision apparatus required to avoid collision, impact, moisture, strong electricity, magnetic field, oil and dust.
- If the tester is not in use for a long time, please remove the battery to avoid battery leakage and damage to the tester.
- Do not disassemble the tester or change the interior.
- Alcohol and diluent have a corrosive effect on the housing, especially on the LCD. So just wipe the housing gently with some clear water.
The contents of this manual are subject to change without notice.

No.6, Gong Ye Bei 1st Road,
Songshan Lake National High-Tech Industrial
Development Zone, Dongguan City,
Guangdong Province, China
Download PDF
UNI-T Vibration Tester UT315A User Manual PDF Download
