Klein Tools VDV226-110 Ratcheting Modular
Crimper User Manual
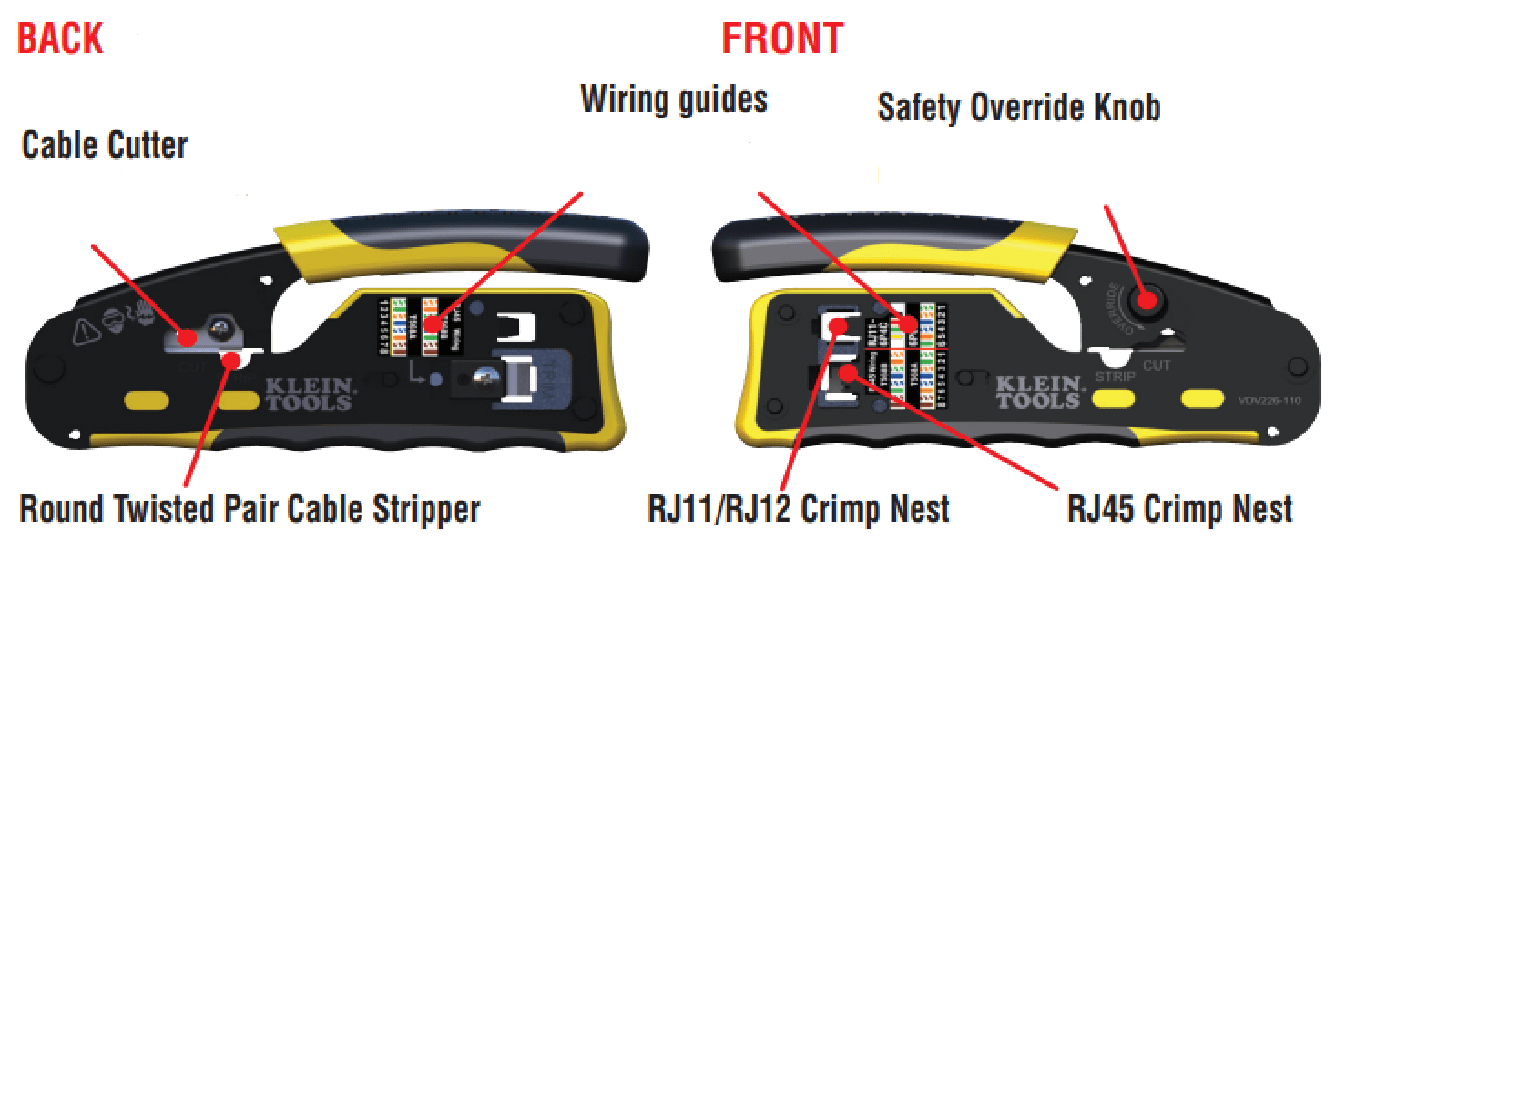
VDV226-110 Pass-ThruTM Modular Crimper
RATCHET SAFETY OVERRIDE:
Carefully turn the safety override knob counterclockwise to release the ratchet mechanism. TIP: To ease safety release knob rotation, relieve the handle tension by slightly squeezing the handle while rotating the safety release knob.
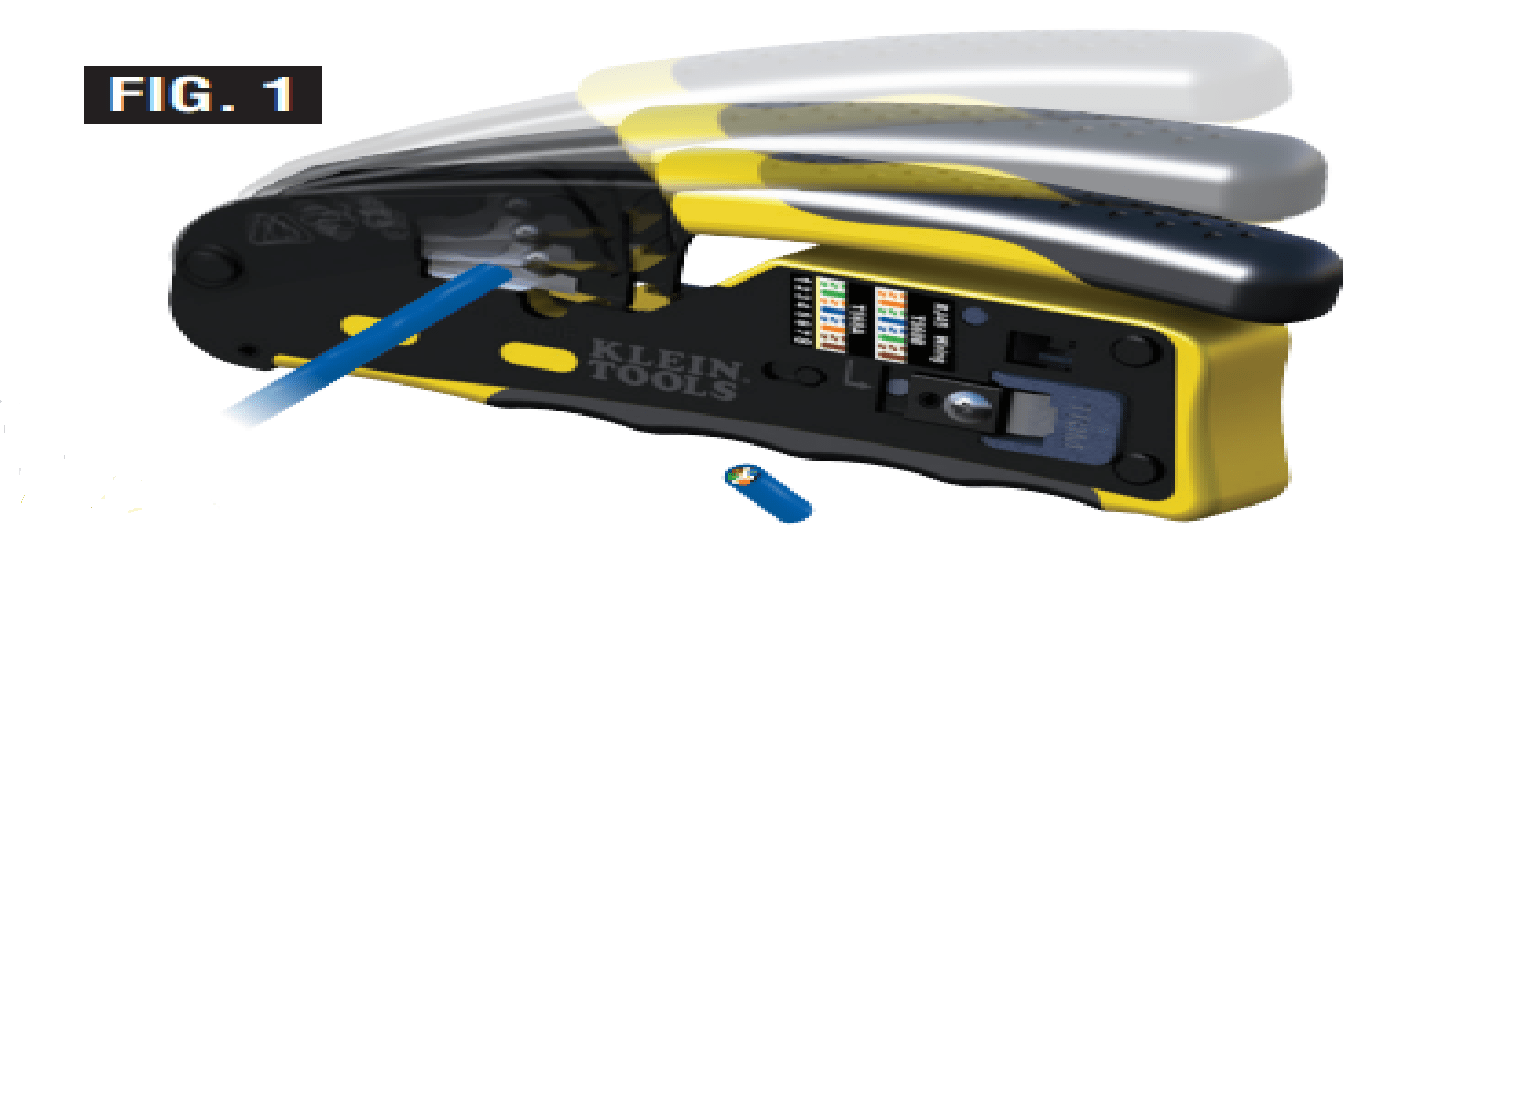
CUTTING CABLE (FIG 1)
- Open the tool completely by squeezing the handle fully to release the ratcheting mechanism.
- With the tool in the open position, insert the cable into the cable cutting cavity.
- To cut the cable, carefully squeeze the handle fully through a complete ratcheting cycle.
- When the cutting cycle is complete, the ratchet mechanism will release and the jaws will open.
- Remove the cable from the tool.
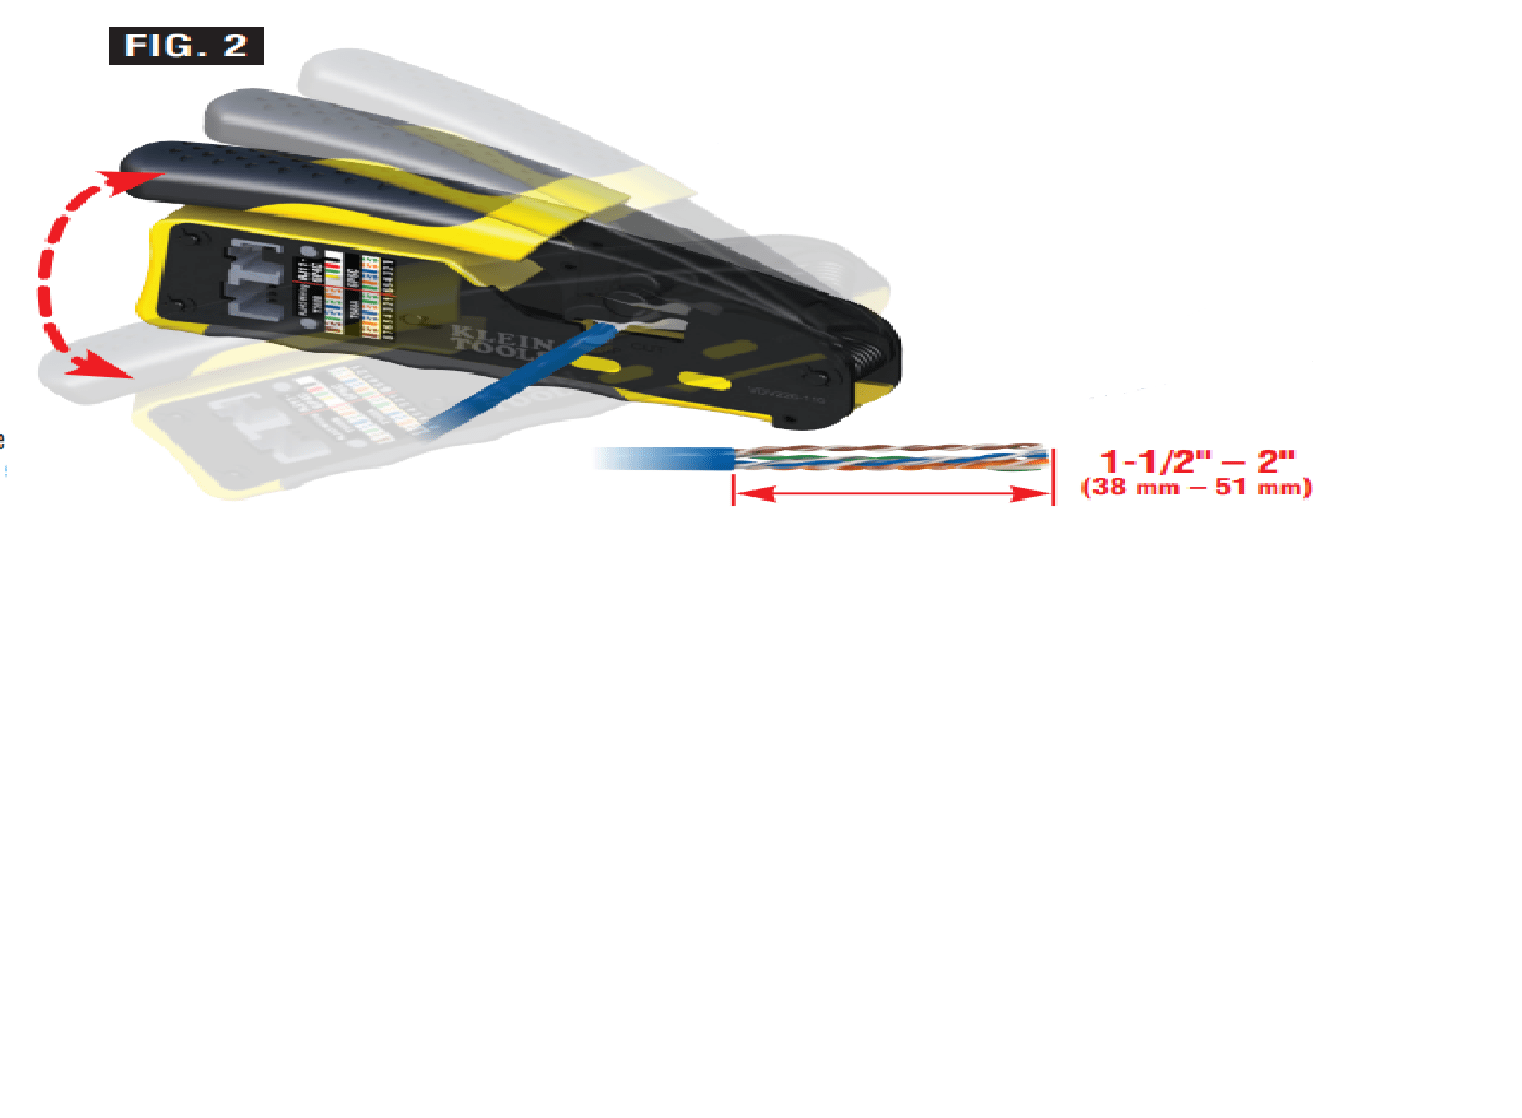
STRIPPING TWISTED PAIR CABLE (UTP/STP) (FIG 2)
- To open tool, squeeze the handle fully to release the ratcheting mechanism.
- With tool in the open position, insert 1-1/2″ to 2″ (38 mm to 51 mm) of cable into the stripping cavity.
- Squeeze the handle and hold in the closed position.
- Carefully rotate the tool around the cable 2 to 3 times to score the outer jacket. CAUTION: DO NOT use the tool to pull the outer jacket off of the cable. This may damage the conductors and the tool.
- Complete the ratcheting cycle by fully squeezing the handle until it releases; the ratchet mechanism will release and the jaws will open automatically.
- Remove the scored cable from the tool. Crack the jacket by bending at score and remove scrap by pulling gently. NOTE: If the blade penetrates the conductor insulation, cut off the damaged cable and repeat steps 1 thru 6.
CRIMPING AND TRIMMING (FIG 3)
NOTE: This tool is not for use with standard (non-pass through) connectors.
- Arrange the wires in proper order (verify wiring order on tool or packaging).
- Using the cut feature of tool, trim the wires straight across. For pass-through RJ45 connectors, trim wires to 1-1/2″ to 2″ (38 mm to 51 mm) protruding from the outer jacket. For RJ11/RJ12 connectors, trim wire to 1/2″ (13 mm) protruding from the outer jacket.
- Slide the connector onto the prepared cable end, inserting the outer jacket beyond the strain latch.
- Insert the connector into the appropriate crimping nest.
- Carefully squeeze the handle fully through the crimping cycle. On RJ45 connectors, the excess wires will be trimmed flush to the face of the connector body during the crimping cycle. Discard scrap. NOTE: The handle will open automatically when the tool has completed the crimping cycle.
- Remove the crimped assembly from the tool. Verify and test connections.RECOMMENDED TESTER: VDV501-823 ScoutTM Pro 2.
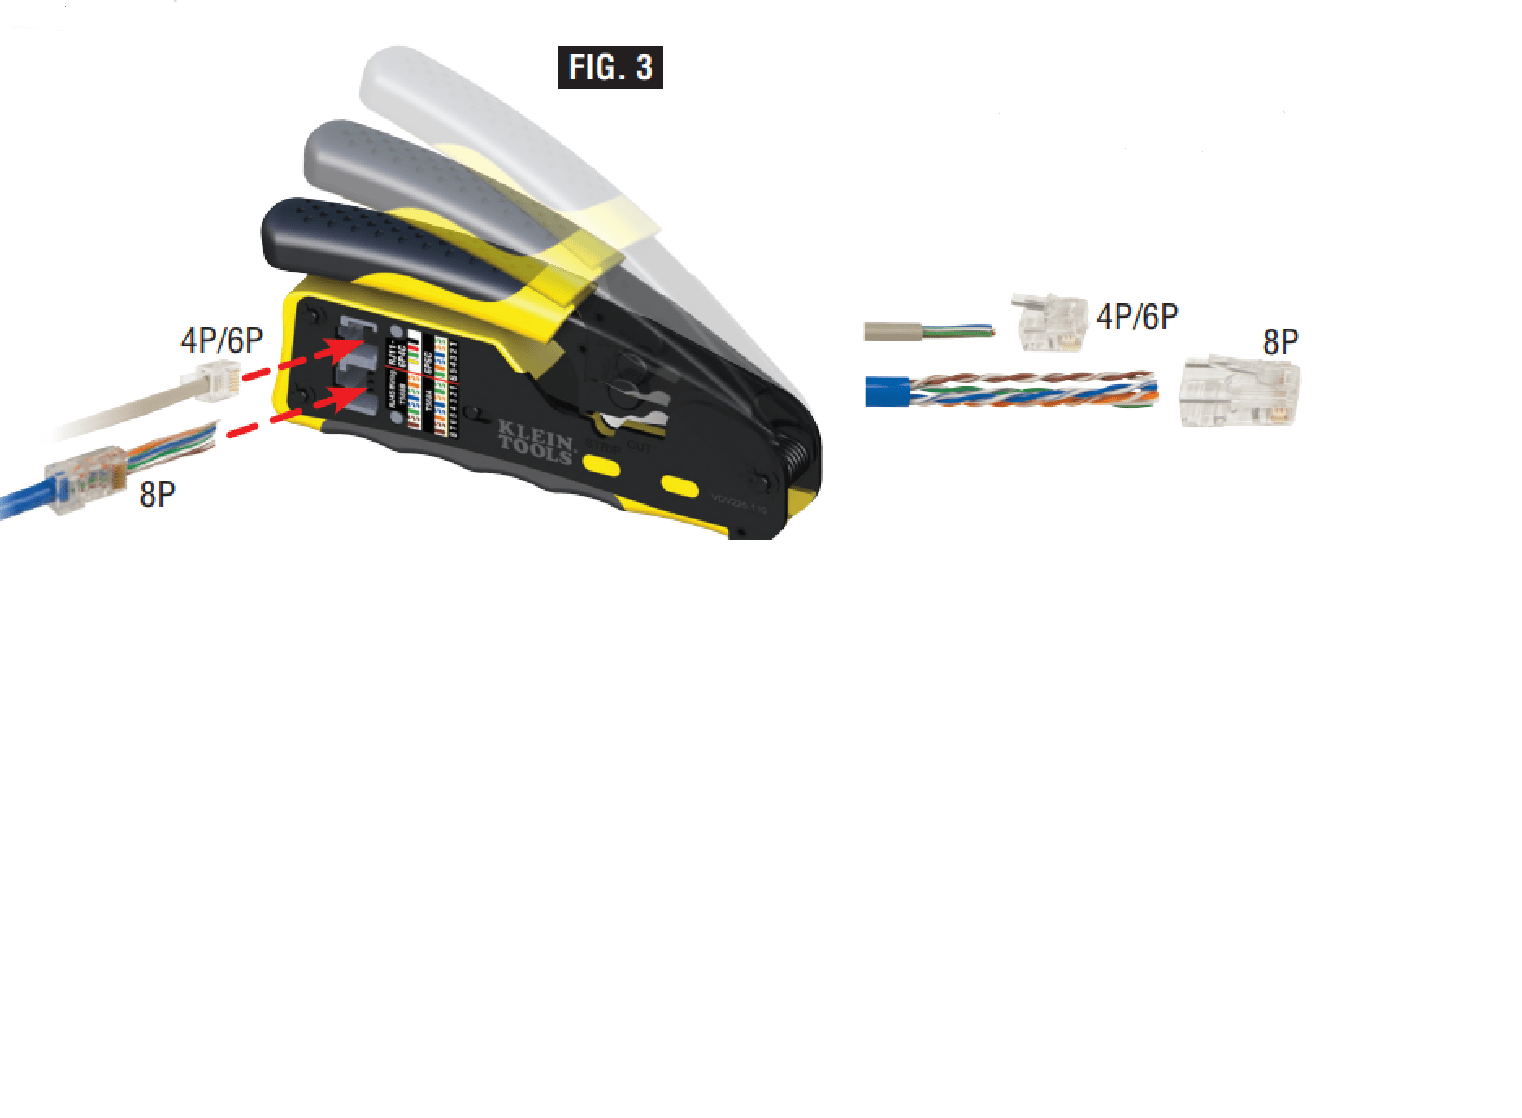
| Crimp Nest Cavity | Connector Type |
| 4P/6P | RJ11/RJ12 |
| 8P | RJ45 |
Download Manual PDF
Klein Tools VDV226-110 Ratcheting Modular
Crimper User Manual PDF Download
