Renpho R-Q001 Smart Jump Rope User Manual
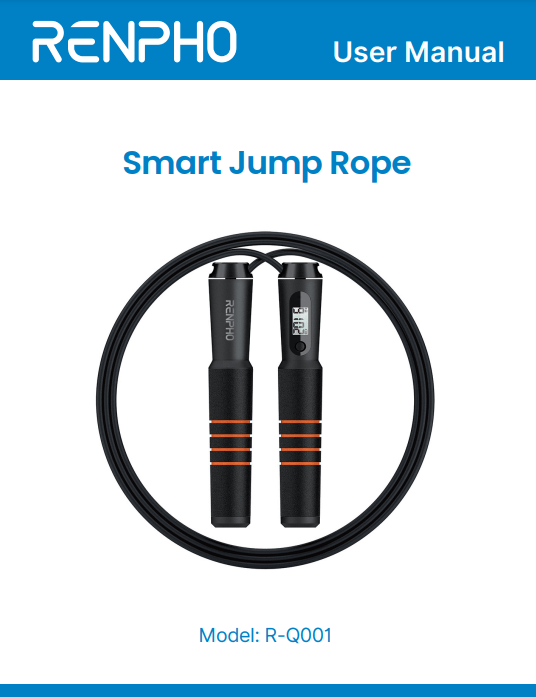
Thank you for purchasing RENPHO Smart Jump Rope!
To ensure safety and avoid any property damage, please read this manual carefully and keep it for future reference
Important Safety Instructions
When using this device, the following basic precautions should be followed.
- Do not use the jump rope for something other than its intended use.
- This is not a toy. Children shall not play with this product.
- Do not skip rope before and within half an hour after a meal to avoid physical discomfort, and do not drink a lot of water before skipping rope.
- If you feel shortness of breath or any discomfort, slow down to get circulation back to normal, then stop.
- Do not keep the jump rope in a magnetic area or a magnet influenced space, which may result in malfunction and battery loss.
- Bending or twisting the jump rope may break the external and/or internal parts of the product.
- Ambient temperature significantly below or above room temperature and any liquid component including water and humidity may damage the parts.
- Do not use strong chemical agents or cleaner to clean the jump rope, it may cause discoloring or corrosion of the exterior part.
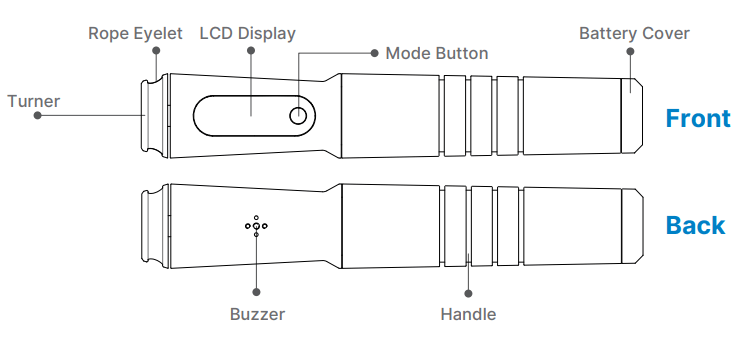
Tip: It is recommended to grip the handle of the rope with the Mode Button facing upward for easy reading of the LCD display.
About the Product
- What’s in the Box
2 × Handles
1 × Rope
2 × Rope Buckles
2 × Rope Caps
2 × AAA Batteries
1 × User Manual
1 × Storage Bag - Product Parameters
Product Name: Smart Jump Rope
Model: R-Q001
App Compatibility: Renpho Health APP
Handle Size: 33×193mm/1.3×7.6inch
Handle Material: ABS+PC+EVA
Rope Length: 3m/9.8ft (Adjustable)
Rope Material: TPU+Steel Wire
Power Supply: 2×AAA Batteries
- Product Introduction

Using the Product
Battery Installation (Batteries are included.)
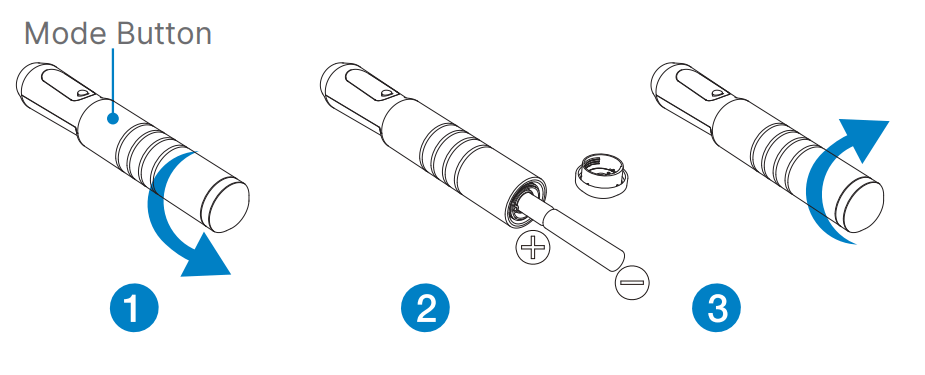 ① Rotate the battery cover of the handle with a display counterclockwise.
② Place the provided batteries into the battery compartment. (Make sure that the two positive poles are facing inside.)
③ Rotate the battery cover clockwise until it is installed tightly.
Operation
*Once battery installation is complete, the jump rope will automatically power on.
*Once the jump rope enters the standby mode, press the Mode Button to activate it.
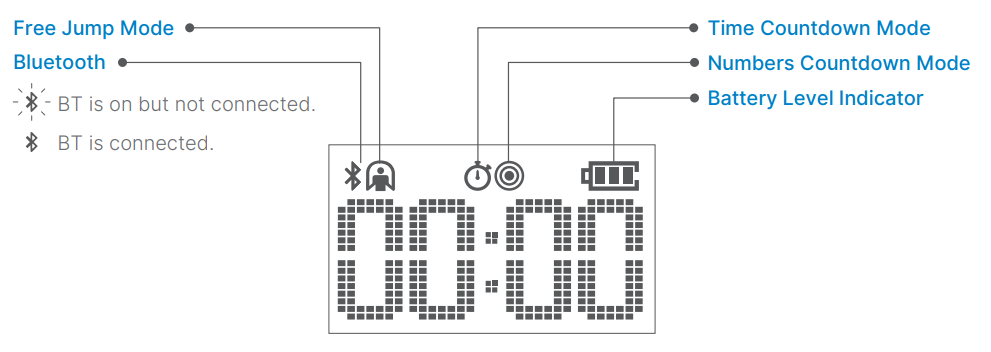
Training Mode Setting
(1) Setting the Free Jump Mode

- Once the jump rope is powered on, the Free Jump mode will be automatically activated.
- Start to rope skip and the skipping number will be shown on the display. (If left idle for 3min, the jump rope will enter the standby mode and the data will be automatically saved on the jump rope or synced to the app if the connection is successful. Then the jump rope will shut down 20s later.)
- To reset or to manually save the data to the jump rope, press and hold the Mode Button and the data will be synced to the app if the connection is successful.
(2) Setting the Time Countdown Mode
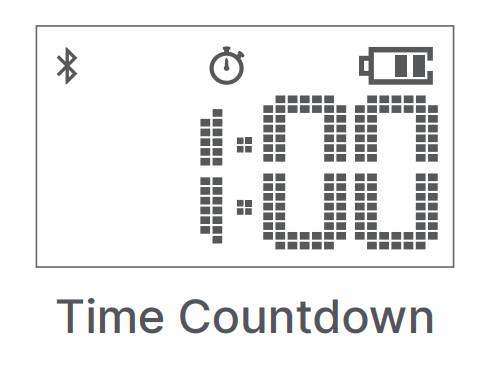
- Press the Mode Button until
 appears on the display.
 - Press and hold to enter the Time Countdown mode. (a short beep)
- Press to select rope skipping time from 1min to 10min on the jump rope (You can select up to 59min and 59s via the app) and long press to get started. (The display will show 3-2-1 countdown with beeps, followed by a long beep to remind you to start.)
- The jump rope will play six beeps as a reminder of the completion of the target. The display will automatically show the rope skipping number and the data will be automatically saved to the jump rope or synced to the app if the connection is successful.
- To stop during the set time or to manually save the data to the jump rope, press and hold the Mode Button and the data will be synced to the app if the connection is successful.
Tips:
- During the set time, if the jump rope is left idle for less than 3min, the display will show the skipping number when the time countdown is over (six beeps) and the data will be automatically saved to the jump rope or synced to the app if the connection is successful. The jump rope will shut down 200s later from the start of being idle.
- During the set time, if the jump rope is left idle for more than 3min, the display will show “–:–” after 3min idle time (a short beep) and the data will be automatically saved to the jump rope or synced to the app if the connection is successful. Then, the jump rope will shut down 20s later.(3) Setting the Numbers Countdown Mode
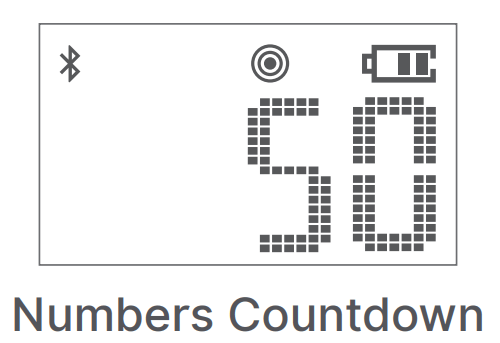
- Press the Mode Button until
 appears on the display.
 - Press and hold to enter the numbers countdown mode. (a short beep)
- Press to select the number from 50 to 2000 on the jump rope. (You can set up to “9999” via the app.)
- After setting the number, press and hold to get started. (The display will show 3-2-1 countdown with beeps, followed by a long beep to remind you to start.)
- When the numbers countdown is over, the time spent will be displayed and the data will be automatically saved to the jump rope or synced to the app if the connection is successful.
- To reset or to manually save the data to the jump rope, press and hold the Mode Button and the data will be synced to the app if the connection is successful.
Note: If the jump rope is left idle for 3min, the display will show “ -:–” and the data will be automatically saved on the jump rope or synced to the app if the connection is successful. Then the jump rope will shut down 20s later.
Bluetooth Connection
Once the jump rope is turned on, the Bluetooth icon on the display will flash. Once the connection is successful, the Bluetooth icon will turn solid and your rope skipping data can be synced to the app.
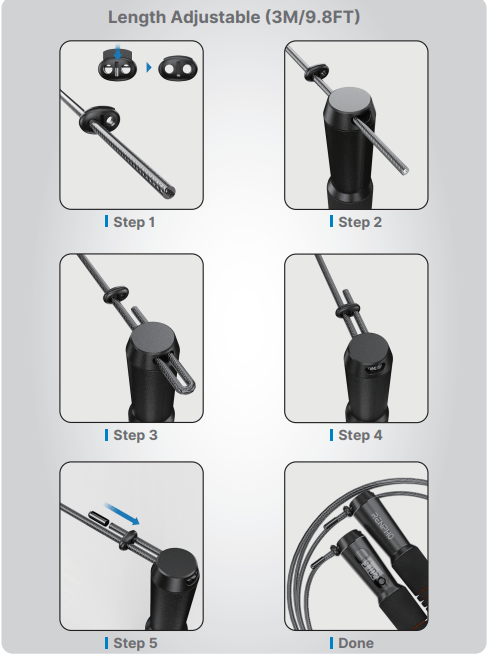
Jump Rope Assembly
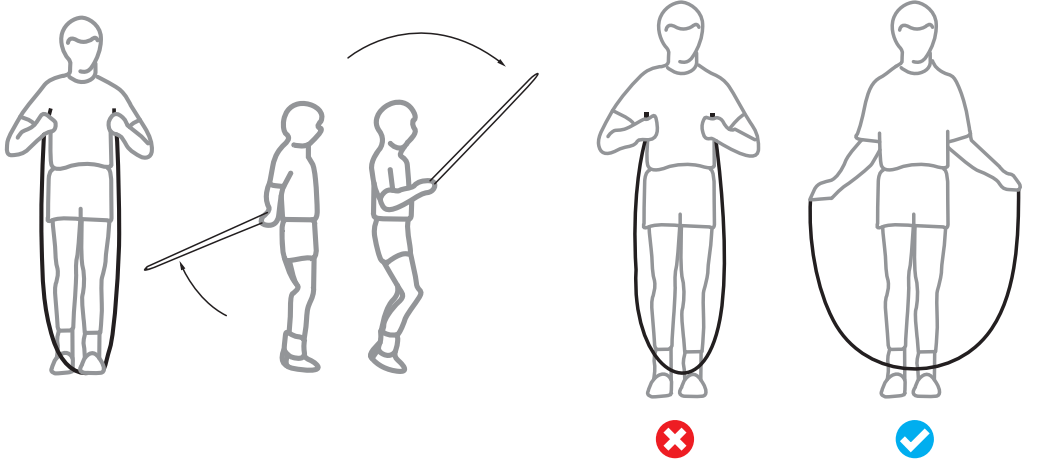
The Guide of Rope Length
- Straighten the rope to your armpits (as shown). Try jumping and check whether the rope length is suitable.
 Please follow the chart below to adjust the rope length.
OPTIMAL JUMP ROPE LENGTH CHART


Renpho Health App Operation Guide
(1) Download the Renpho Health App
Search “Renpho Health” from Apple Store / Google Play or scan the QR code below to download the app. System Requirement: iOS 11.0 or above, Android 7.0 or above.


*Due to continuous updates and improvements, the “Renpho Health”
App may appear slightly different.
(2) Sign up
Register a new account with your email address and complete your profile information, which is only intended for the calculation of parameters such as calories.
Download Manual PDF
Renpho R-Q001 Smart Jump Rope User Manual PDF Download
