Quest 2 Elite Strap for Enhanced Support and
Comfort in VR User Manual
Important notes
- Keep the headset away from sunlight, as sunlight can cause permanent damage to the lenses
- Don’t use alcoholic wipes to clean the headset as this can damage the headset. Instead, you can use non-alcoholic, anti-bacterial wipes
- Don’t perform a factory reset on the headset as this will delete all the games and you won’t be able to play, and we cannot give the headset to our next clients either
- Don’t drop or throw the controllers to the ground or against the wall
1. How to wear your headset?
Video Link: For the Video Tutorial Click HERE
1.1. To put on your headset

- Loosen the side straps and then the top strap.
- Starting from the back, put on your headset.
• Make sure to pull the back strap down until it cradles the base of your head.
• If you’re wearing glasses, put on the headset from the front first. - Tighten the side tabs and then top strap.
• Make sure that the straps aren’t too tight. The headset should fit comfortably and
not apply too much pressure on your face and head.
1.2. To adjust your view
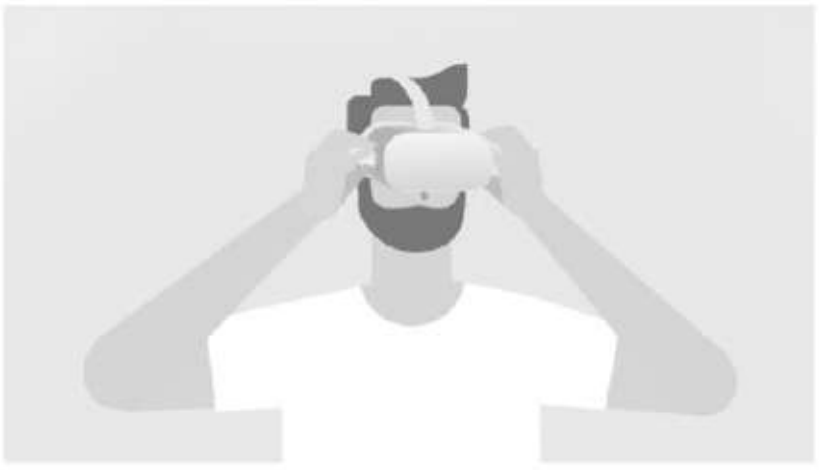
- With your hands holding both sides of your headset, slowly move your Oculus Quest up and
down until the picture is clear and the headset feels comfortable. - If you wear glasses, insert the glasses spacer into your Oculus Quest headset prior to using it.
- If the image in your headset isn’t clear, you can use your left thumb to move the image slider on the left of the bottom of your headset to the left and right until the image is clear.
2. How to Set Up the Guardian to Play
Video link: For the Video Tutorial Click HERE
If you’re setting up Guardian with your Quest for the first time, follow the on-screen instructions.
2.1. Guardian Sizes
Guardian lets you create boundaries in VR that appear when you get too close to the edge
of your play area. When setting up Guardian, your play area will show as one of these sizes:
- Below Minimum: If your play area is below minimum, it doesn’t meet the 1 meter by 1
meter requirement to use Guardian. - Minimum: You have enough space for the minimum required play area, but some apps may
recommend at least 2 meter by 2 meter for the best experience. - Recommended: You have the recommended play area for Roomscale experiences. This
means that your play area meets or exceeds the 2 meter by 2 meter space needed to set up
the Guardian System.
2.2. Resetting Your Guardian
- Select Settings from the bottom toolbar.
- Select Guardian in the left menu.
- Click Set Up Guardian.
- Follow the on-screen instructions to reset your Guardian.
3. Controllers
Video link: For the Video Tutorial Click HERE
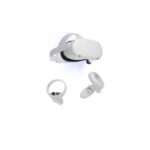
The Oculus Quest Touch controllers are a pair of tracked controllers that give you hand presence—the feeling that your virtual hands are actually your own. Touch controllers feature traditional action buttons, thumb-sticks and analog triggers that add familiarity to new experiences.
You can use your controller to interact with apps and games, using the buttons on your
controller to do the following:
- Trigger, A and X buttons: Press to select things.
- B and Y : Press to go back to the previous screen or menu.
- Oculus button: Press to go back to Oculus Home or press and hold to reset your controller
orientation. - Grip button: Press to grab objects or make a fist when using your virtual hands.
- Menu button: Press the menu button from Oculus Home to bring up the menu.
- Press any button to wake the controller after you turn on your headset.
Note: Individual apps may include their own tutorials for how to use the buttons on your Oculus Touch controllers in each VR experience.
4. How to Connect to the WIFI
Your Oculus Quest needs to be connected to a Wi-Fi network to use and access most features and content.
To change the Wi-Fi network your Oculus Quest is connected to from your Oculus Quest Headset:
- Turn on your Oculus Quest and put on your headset.
- Select Settings from the bottom toolbar menu.
- Select Wi-Fi.
- Select the Wi-Fi network you’d like to connect to.
- If prompted, enter the password for the Wi-Fi network you’d like to connect to.
- Select Connect to connect to the Wi-Fi network.
5. Safety Notice
5.1. Be careful of the real world
Whenever you use your Quest you’ll set up a Guardian boundary that marks the edges of your play area. This boundary ensures you don’t bump into anything and have a safe area to play in. That being said, it is very easy to forget that you’re blindfolded to the real world. If you’re playing at home, for example, it is a good idea to warn other people that you’ll be going into VR before you go in and that they know your play area boundaries too. Also be careful of pets — if you have a particularly affectionate animal and plan to play a pretty active VR game, it might be a good idea to keep them in a separate room until you’re done playing.
5.2. Take Breaks
6.1. Library / Apps
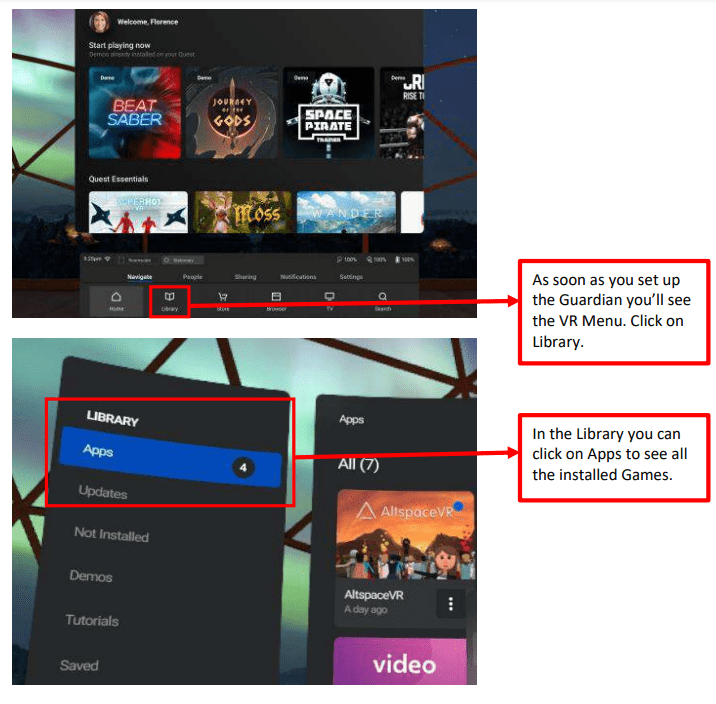
6.2. Library / Unknown Sources / Quest App Launcher

Download Manual PDF
Quest 2 Elite Strap for Enhanced Support and
Comfort in VR User Manual PDF Download

